Check out this awesome eat-in kitchen makeover. We didn’t even have to paint the walls, changing out the furniture made the biggest impact!
 I finished up an eat-in kitchen makeover, client project last week and I think it turned out great!! This was a pretty straightforward project and didn’t require a whole lot of work, outside of purchasing a few items. However, I think the results speak for themselves.
Here is the before:
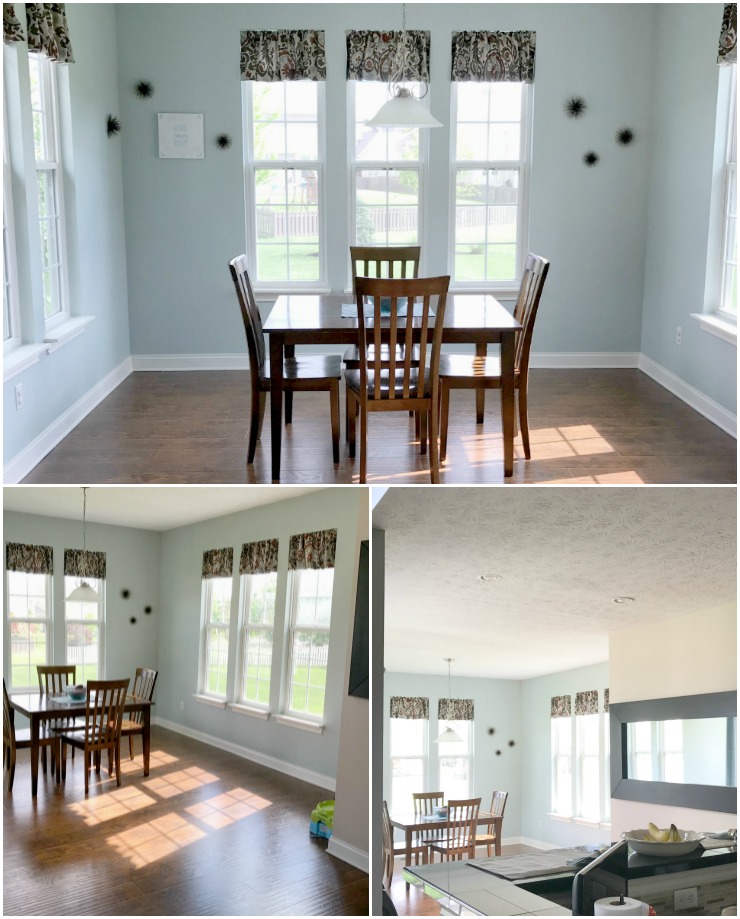
This area is right off the kitchen and you can hopefully get a feel for where it’s located from the last picture. The client’s kitchen is pretty small, but they added onto this area a few years ago and it really opened up the space.
She wanted to keep the wall color, so we didn’t even need to paint! 😉

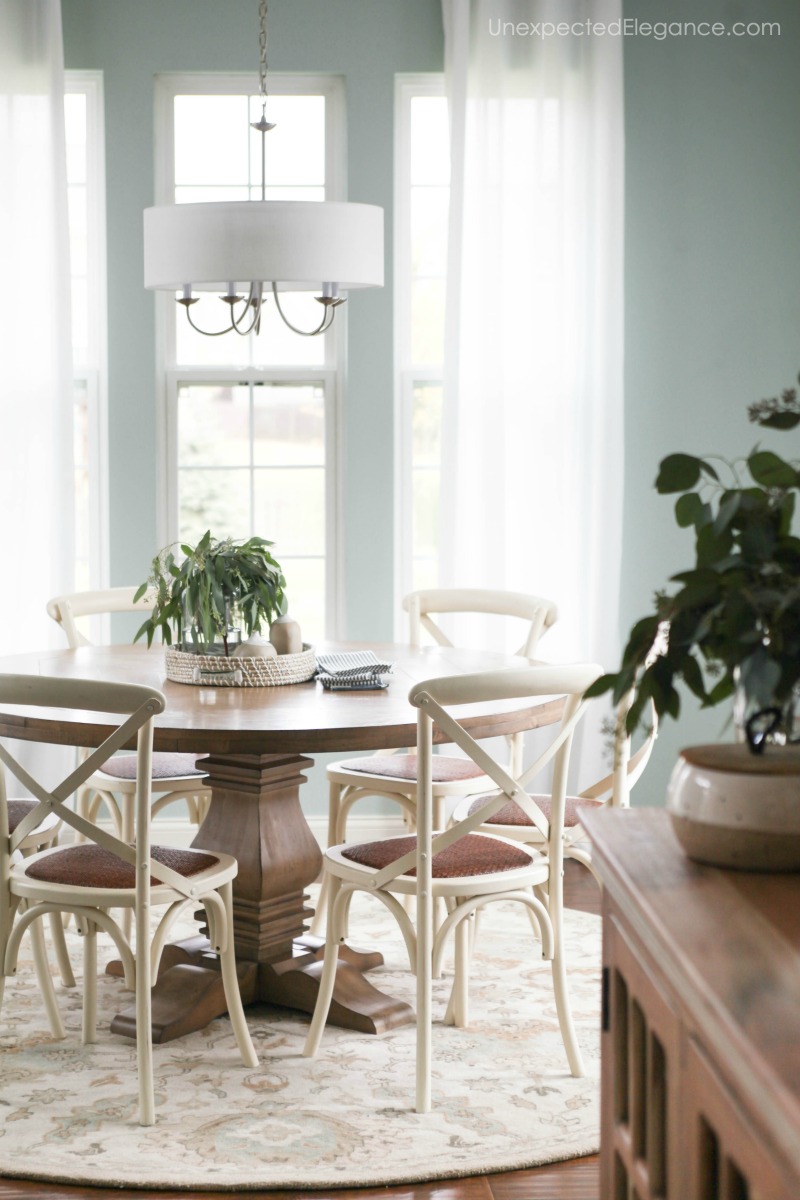
The biggest change for this eat-in kitchen makeover was switching out the square table for a round one. She wanted a table that would seat between 6-8 and this one is perfect. I think she was a little worried that it might be too big…however, once it was installed she said: “Maybe we could have gone even bigger!” 🙂
My tip if you have a round table is to use a round rug. Normally you want it to be at least 8ft. round, unless it’s a really small table. It should also extend about 36 inches beyond all sides of the table (no less than 24), so chairs can sit on a flat surface.
For more room decor tips, check out my HOME DECOR TIPS Section.
SHOP THIS ROOM:

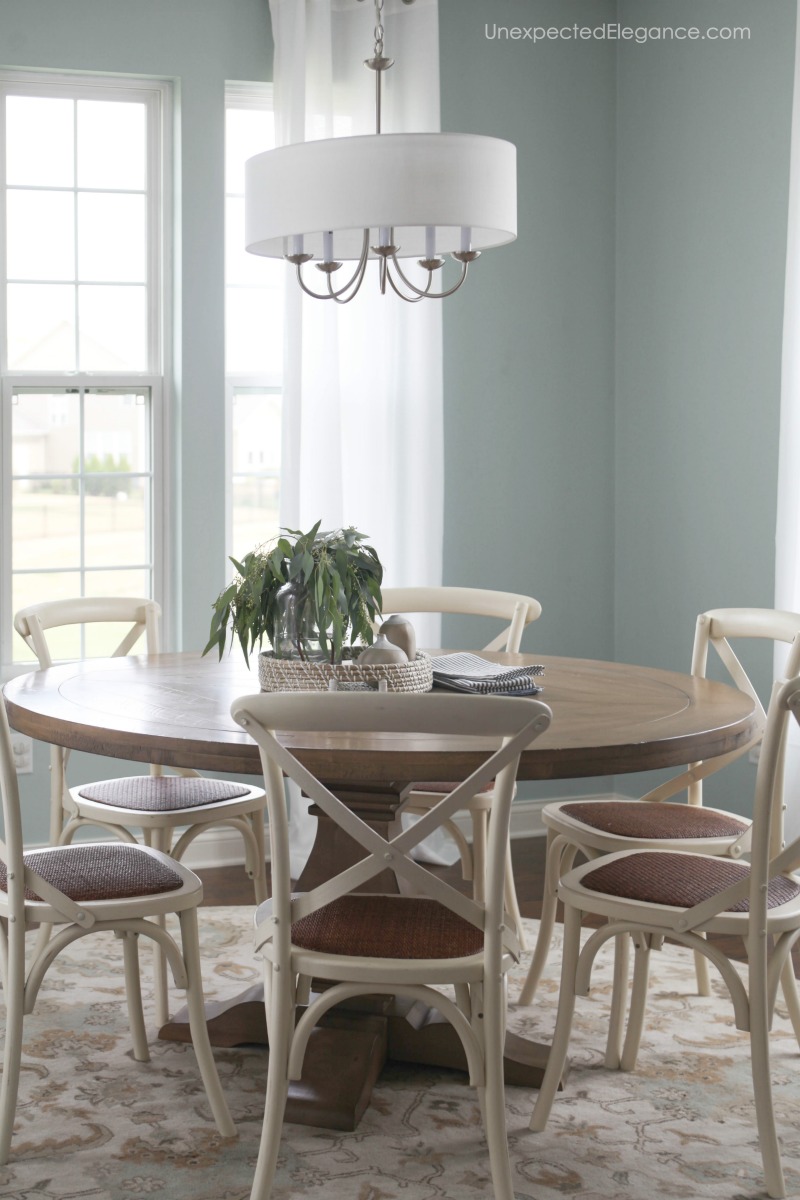
They updated the lighting, which was the only real physical change to the room. The floor to ceiling curtains add a softness and make the ceiling feel taller.
Want to find out about my design service? Sign-up below ↓
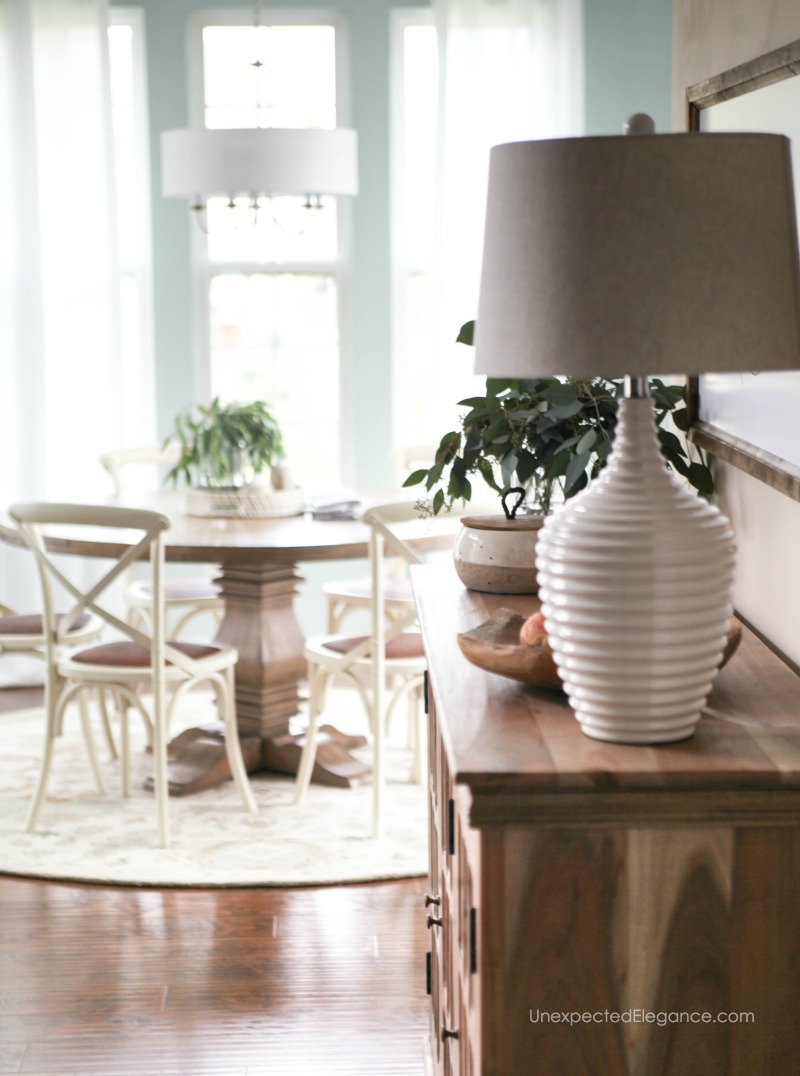
She wanted a little more storage, so we added a buffet in the transition area that flows into the kitchen. It brings in more of the wood tones and is a BEAUTIFUL color!
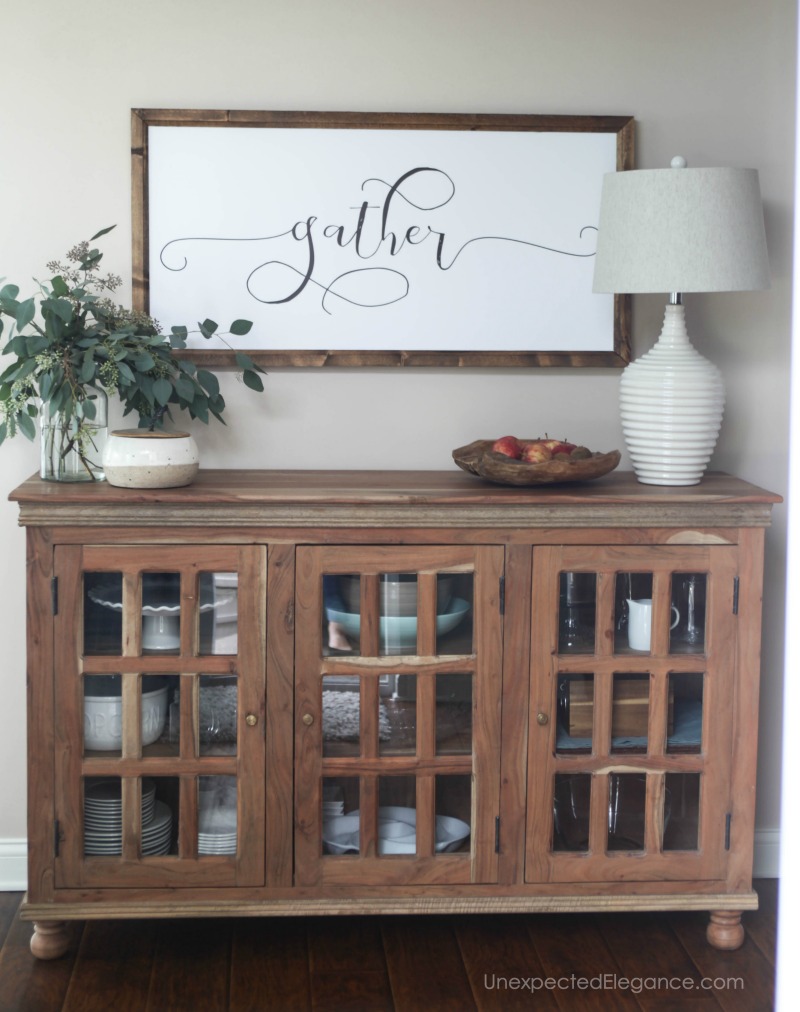
This area will be great when they are entertaining and holds the overflow of dishes from the kitchen.

I’d love to know what you think!!
SHOP THIS ROOM:
Want to find out about my design service? Sign-up below ↓


What a gorgeous transformation! The way you’ve utilized the space makes it feel both inviting and functional.
### **Eat-in Kitchen Makeover | Client Project ️✨**
A transformation designed for **functionality and style**! Here’s how we revamped this cozy eat-in kitchen:
**Before:**
– Outdated cabinets & worn countertops
– Limited seating space
– Dim lighting
**After:**
– **Modern cabinetry** with clean lines
– **Bright, airy color palette** (soft whites & pastel accents)
– Added **custom seating** for a more inviting dining area
– Installed **pendant lighting** for a warm ambiance
– Upgraded **countertops** and backsplash with durable materials
**Result:** A sleek, **space-maximizing kitchen** that’s perfect for family meals and entertaining!
I have been tinkering with a breakfast nook redo and learned that durability beats aesthetics when chairs live under a sunny window. My first set looked great in photos but the finish clouded after a damp mop day and the legs wobbled on tile. Now I test pieces with a week of real use before I commit and I keep a tiny notebook of how surfaces handle spills and heat. In that process, polywood furniture started popping up in recommendations because people kept mentioning weather resistance and easy wipe downs. I was skeptical at first since recycled materials can feel plasticky, so I borrowed a friend’s bench for a weekend and paid attention to creaks, scuffs, and how it slid. What won me over was the low maintenance routine and the fact that it did not bleach near the patio door where light is brutal. For a small home like mine the ability to take the same seating outside for a cookout and bring it back in after cleanup is a quiet money saver. If anyone is balancing kid proof surfaces with a room that still photographs nicely, I would suggest prioritizing clean lines and tight hardware tolerance. I also learned to budget for felt pads, an adjustable foot kit, and a stain marker so the whole setup keeps looking intentional.
Fela News publishes Latest education news that helps learners stay ahead by following academic trends, policy changes, and exam announcements nationwide.
That eat-in kitchen makeover post really captures how small changes like a fresh coat of paint, new lighting, and decluttering countertops can transform a dated space into a warm gathering spot for family meals. It reminded me that you don’t need a full renovation to breathe new life into your home. While I was looking for trustworthy home improvement financing options, I checked https://clearpath-lending.opinion-corp.com/review.html to read real customer experiences before committing to any loan. In conclusion, whether you are updating your kitchen or researching financial services, learning from others’ experiences helps you avoid costly mistakes and choose reliable partners.
It gives users balance. It helps them choose wisely. Over time, users develop taste. They know what feels right. They choose names faster. They create better results. This skill improves with practice. The platform supports that princess names. It makes it easy to explore. It makes it easy to improve. Creativity becomes stronger. Ideas become clearer. Everything starts to connect. The process feels natural. It does not feel forced.