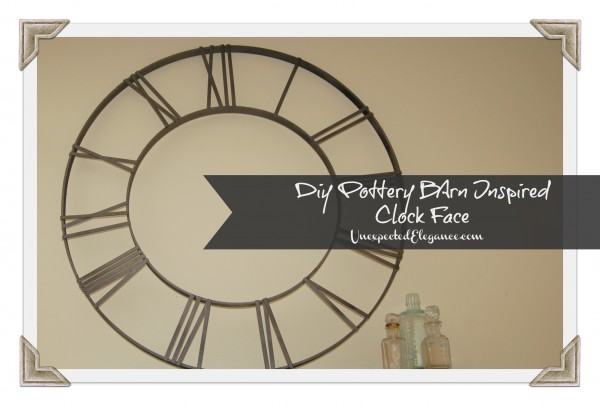
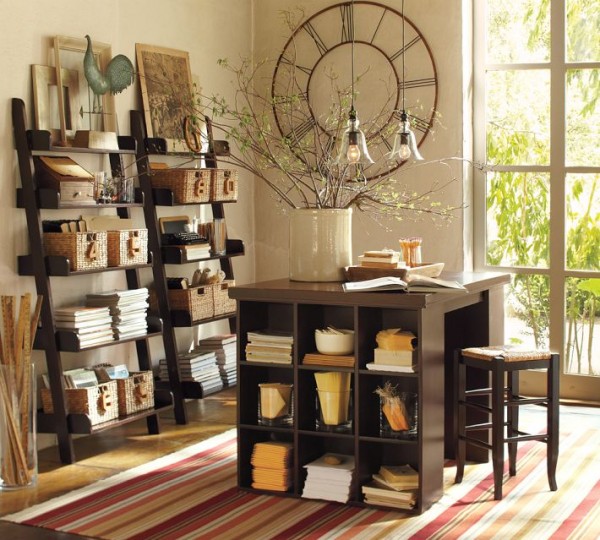
 OK, so if you have been around my blog awhile you know this is a really old post. Like, one of the first ever tutorials I did on here. I still get questions about this one and the past few months I have gotten a few e-mails and comments about the original post missing pictures. I’m not sure why they are no longer there, but regardless the problem needed fixing. My solution was to just start over…So here is the new/old tutorial on how to make the below clock face from Pottery Barn.
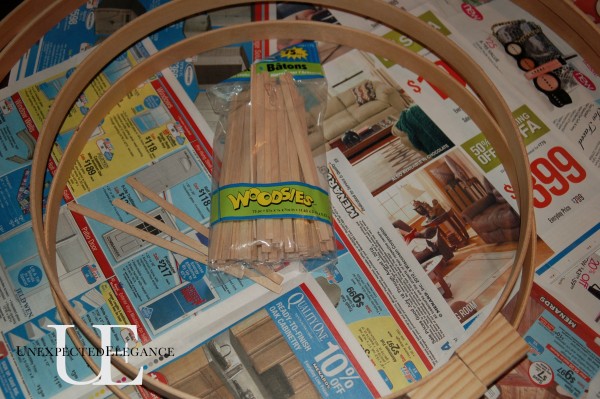
 Materials: (1) 23″ Quilt hoop, (1) 14″ Quilt hoop, bag of Woodsies brand sticks (found at Joann’s)
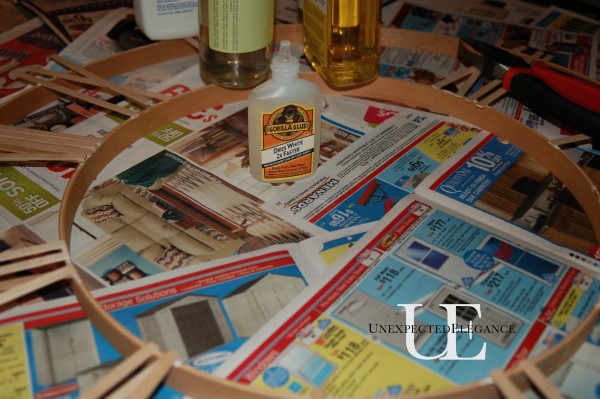
First, I removed the outer hoops and started working around the, soon to be, clock face. I used Gorilla Glue, but I’m sure wood glue would work too. I did not cut any of the sticks before I put them on, I just tried to line up the inside and leave the overhang on the outer edge.
The “X†was the trickiest and I just used whatever I could find to hold them down. I let it dry overnight.
**You could also use hot glue, but I don’t know how well it will hold up.**
The next morning I took a razor and scored the sticks where I needed to remove them.
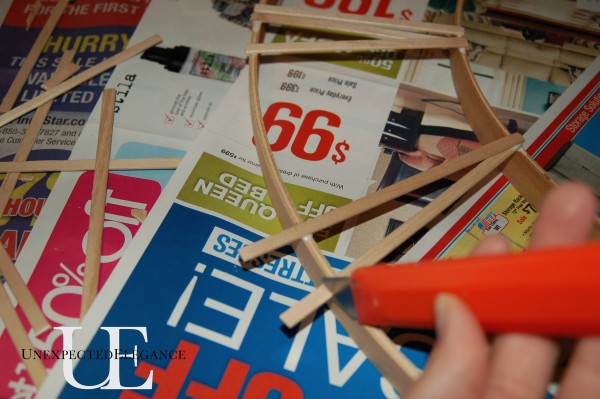
Then I used a pair of pliers to break them off. Try not to pull on the wood, it will splinter. Just hold the stick, so it doesn’t detach and work the pliers up and down. It will remove the wood clean.
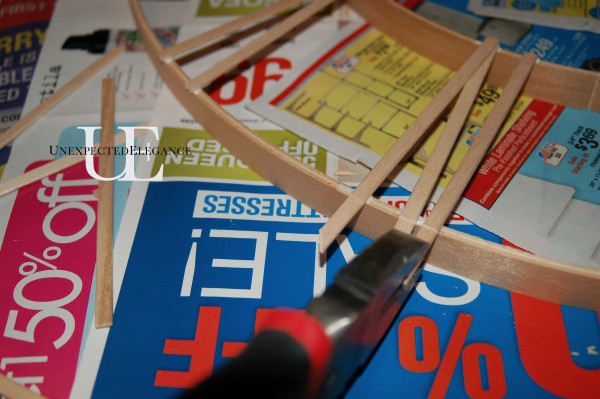
Here’s the cleaned up version.
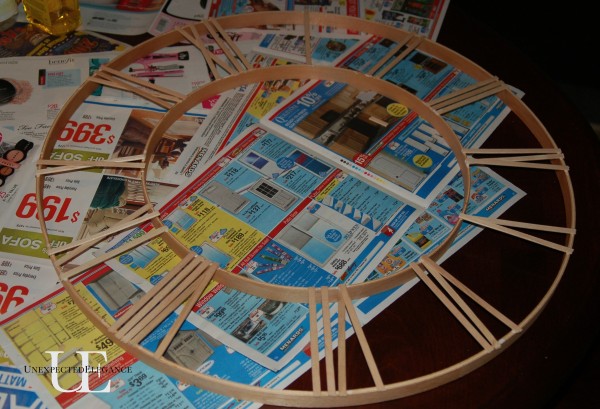
Then I used some Rust-oleum metallic spray paint to give it a metal look.
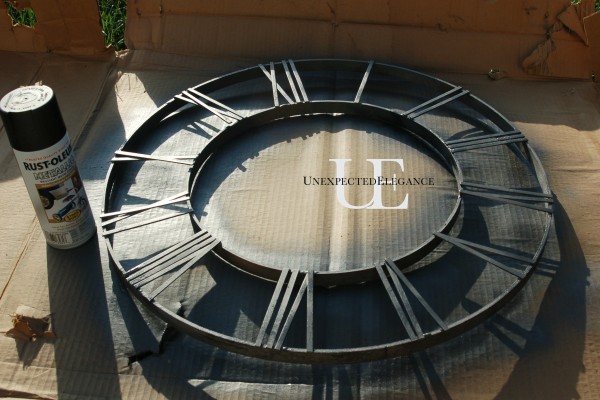
And here’s the finished project.
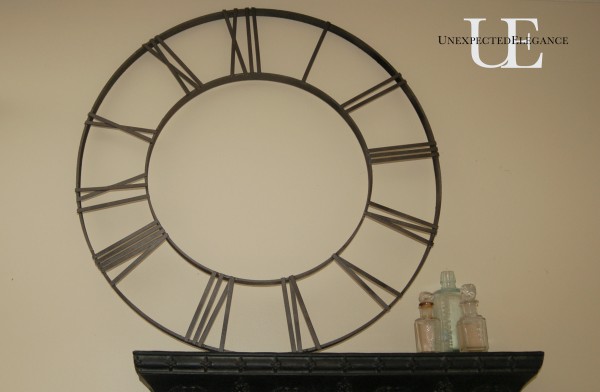
What do ya think?? Looks a lot like the PB pic, don’t you think!
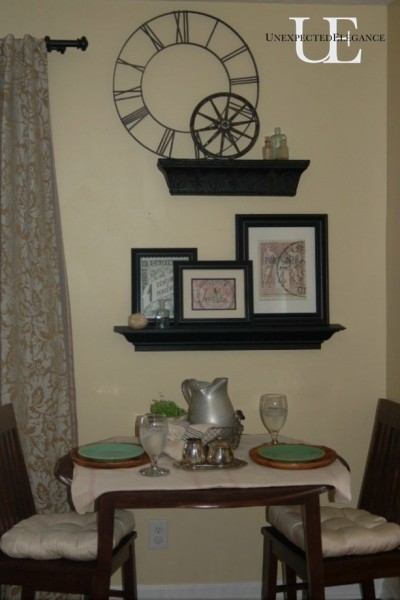
I don’t recall exactly how much I spent on this but I think it was around $10. (I got my supplies at Joann Fabric with coupons.) I hope the pictures explain everything a little better for you!
**********************************************
I’m almost finished with my office, so I’m hoping to have a few updates to share with you soon…Don’t hold your breath or anything! 😉
Angela
You might also like some of my other Pottery Barn Knock-Offs!


That clock face is genius. Affordable, fairly easy and great, love, love it. How clever of you to figure out how to replicate the PB clock face. I’m not a PB shopper or looker so get ideas from you clever bloggers.
This looks like a great project for my hubs. For one he has alot more patience than I do and it would be a good project for him. I might have to substitute smaller sized hoops for ones I already have but we’ll have to buy the sticks.
Hubs had a stroke in 201 and still has some problems with his left arm/hand and he’s left handed. I try to get him to do things like this with his hand so he doesn’t know my ulterior methods. This is a great project for him and I’ll get a wonderful decoration, already have the metal spray paint. Love your blog and you always inspire me one way or the other. Happy Days
Absolument génial!!!!!!!
Grand bravo!
Kisssss…
Love this project….so very creative! I never would have thought of this, but I think I may have to try it.
Wow! Who would have thunk. It looks identical. Way to go!
That looks fantastic!! Great job and price! Thanks for sharing. I think I’m going to try one.
Wonderful results, wonderful directions and low cost, also nice. Great job! Many thanks.js
Thanks, Jackie!
Great tutorial!
Just fininshed my clock face and now waiting for it to dry so I can paint. Lovin’ it!
I used Elmer’s wood glue and it set up very quickly here. Of course, I live in the desert so things do tend to dry faster here.
In under two hours, I was able to trim the ends off the wood sticks. I used a very sharp razor knife and cut right along the edge of the hoop all the way through without using the pliers to snap off the extra at the end. This left a fairly smooth edge and then I took a baby emery board, that my daughter left here one time when she brought my grand baby over, and I sanded off what little splinters there were after cutting off the extra. I am going to paint it with the Rust-oleum multicolor textured paint in brown
Thanks so much for the tutorial and for sending me the picture of the package of Woodsies so that I could see the numbers. You are so sweet! Did I say that I loved it? 🙂
Debbie, I’m so glad!!! 🙂
p.s.: Fieldsfabrics.com had a great price on the Woodsies and great shipping (price and timing). $2.59 for #1021175 and less than $2.00 for standard shipping which arrived in the same time frame as priority mail!
I loved this DIY project is so inspiring. As a student, I’m always looking for affordable ways to decorate my space, and this Pottery Barn-inspired clock face is such a creative idea. It also reminds me of how engaging hands-on projects can be, especially when paired with online communities. Speaking of connecting with others who love crafts and DIY, I recently came across this Facebook page that shares a lot of my super geek reviews and geeky and creative inspiration. It’s always fun to find new ideas and motivation for personalizing spaces. I can’t wait to try making this clock face for my own room.
Sand the surface lightly for a smooth finish. If using pallet wood, Ragdoll Hit arrange planks around the edge to form a rustic border, securing with construction adhesive and screws.
I’m not sure why they’re no longer there, but whatever the problem is, it needs to be fixed. My solution is to start over…
Decorating the wall with a clock face not only helps you keep track of time but also creates a highlight for your living space. baseball 9
A great experience. Gain experience in geometry and maximize your talent. This skill-based sport is a great challenge to master. ragdoll playground Explore and expose yourself to a variety of technical programs.
I used Gorilla Glue, but I’m sure wood glue would work too.
I really enjoyed this DIY project, it was really inspiring. As a student, I am always looking for budget-friendly ways to decorate my space, and clock faces
It’s awesome how these sports games combine action, strategy, and excitement in one place. Every match feels new and keeps me coming back for more!
oh, i love thost ideas so much, its beautiful
I still get questions about this one luckynuggetcasino-ca.com
Wow, I love the idea of making a clock face from scratch! It reminds me of when I crafted my own wall art—what paint colors did you use for yours?
I’m obsessed with this Pottery Barn dupe! DIY projects can be intimidating; sometimes my attempts feel like a total ragdoll hit against a wall of frustration. But your clear steps make this clock face look so achievable and elegant. Definitely saving this for my weekend project—thanks for the inspiration!
I love DIY projects and this Pottery Barn inspired wall decor clock is no exception. It’s amazing what you can create with a little bit of creativity and effort. For more fun DIY ideas, check out FunBoxie.
Love this reminder. In this chaotic world, spreading love and care is our own beautiful x trench run.
This is so cool! I love how you used the quilt hoops—I never would have thought of that. The way you explained the stick part makes it feel doable even for a beginner like me. Play Pressing Under Pressure
This is so cool! I love how you used the quilt hoops—I never woulda thought of that. The sticks look like a fun way to spend an afternoon with my kiddo, even if we make a lil mess. Use Flux 2
This is so clever! I love how you used the quilt hoops—I never woulda thought of that. The spray paint makes it look like real metal, not just sticks. Play Peggy’s Post
I love how you used the quilt hoop for the base—such a clever idea! My kid and I tried this and the sticks were a little tricky to line up, but we just kept going and it turned out super cute. Thanks for sharing the steps again! Use Novatools
I love how you used the quilt hoops for this! My kid and I tried something similar with popsicle sticks last weekend and it was so much fun (and a little messy lol). Thanks for re-posting this, the pics really help! Use Home Design AI
I love that you re-did this tutorial! The quilt hoop idea is so smart—I never would’ve thought to use one for a clock. Can’t wait to try this with my kiddo this weekend, even if our sticks get a little gluey. Play Finn’s Fishing Bonanza Online
This is such a clever idea! I love how you used the quilt hoops—never woulda thought of that. The little sticks make it look so rustic and cozy, like somethin from a fancy store but way more special cuz you made it yourself. Play CaptchaWare
Love how this turned out! My kid kept calling it a “spider web clock” while I was gluing the sticks lol. Gonna try this for his room. Play Splunko Drip
This is so smart! I love that you used different sized quilt hoops—I never woulda thought of that. My kid is gonna help me make one for their room, but we might use popsicle sticks instead since that’s all we have. Play Scritchy Scratchy
I love how you used the quilt hoops for this! My mom had an old one in her sewing stuff and now I’m gonna try to make my own clock with it. The part about scoring the sticks first is so smart—I def woulda just yanked them off and made a mess lol. Use GptDetect
This is so smart! I love how you used the quilt hoops—I never would have thought of that. Now I kinda wanna try making one with my kiddo for their room, even if the numbers end up a little crooked Use Picool
I love how you used the quilt hoops for this! My kid and I tried somethin similar last weekend and she kept calling it her “big round puzzle.” The gorilla glue tip is a lifesaver—we used hot glue at first and it totally let go overnight. Play Idols Of Ash
I love how you used quilt hoops for this—such a clever idea! My kids helped me pick out the sticks at the store and we made a mess with glue, but it turned out so cute. Thanks for redoing the tutorial, the pics really help! Play Trees Hate You
I made this with my 8-year-old last weekend and she felt so proud hanging it in her room! We used popsicle sticks insted of the fancy ones and it still looked super cute. Use Reveedo Generate images and videos
Ohhh I love how you used the quilt hoop! Never woulda thought of that but it makes total sense. The way you lined up the sticks before cutting is a real pro tip—definitely gonna try this for my kid’s room clock project. Play Castle Busters
I love how you used a quilt hoop for this—such a smart hack! I always see those at thrift stores and never know what to do with them. Now I gotta try this for my kitchen wall. Play Cobb Can Move
I made this with my kid last weekend and it was so fun! We used popsicle sticks instead of the Woodsies and it still looked super cute. Just a heads up—our glue took a bit longer to dry, so we had to be patient. Play Scooby Doo Creepy Run
This is so cool! I love how you used the big hoop and little hoop together—I never woulda thought of that. The sticks look kinda like sun rays, my kid said it looks like a “spiky pizza” lol. Use Image to Image
I love how you used the quilt hoops—such a clever idea! My kids helped me make one and we called it our “sun clock.” The sticks were a bit tricky to snap off, but we got it to werk in the end. Play Im Not A Robot Game
I love how you reused the quilt hoops—such a clever way to get that round shape without needing a saw! The tip about scoring the sticks with a razor before breaking them off is super helpful too, I always end up with splinters when I try to just snap them. Play Death Spiral