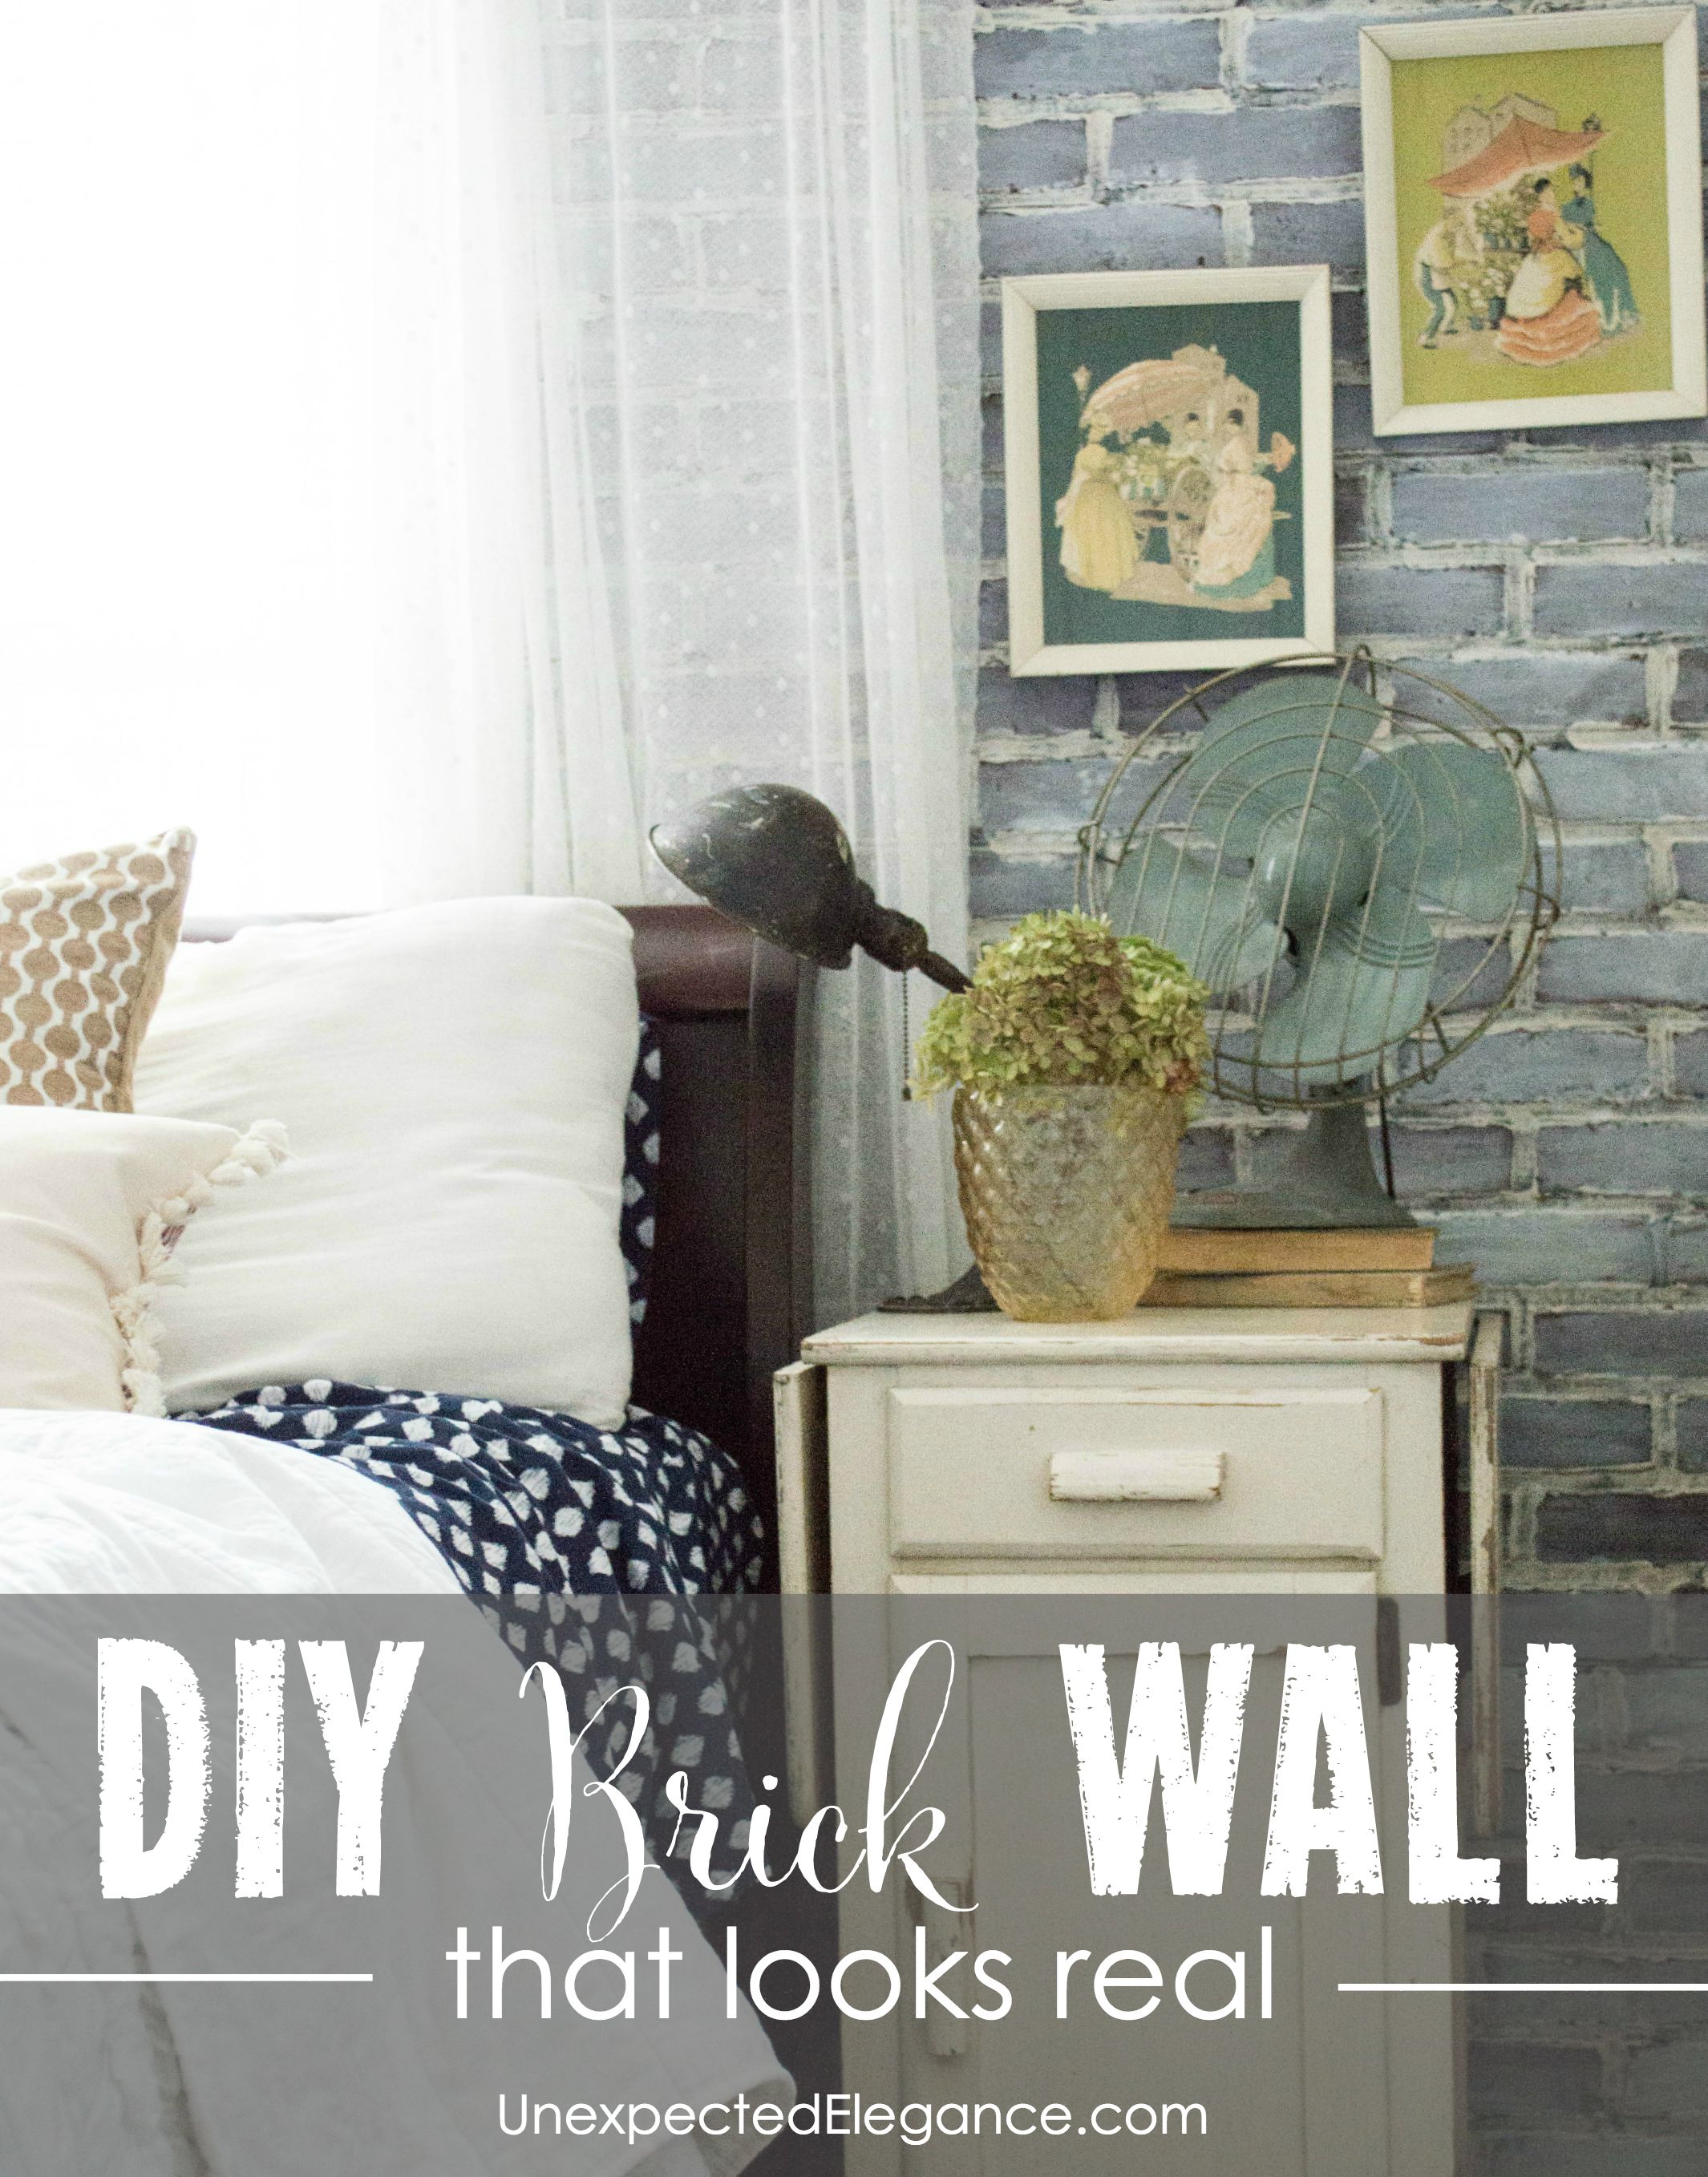
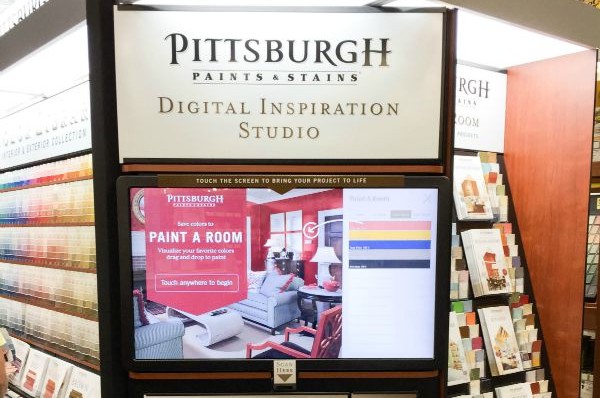
My guest bedroom has needed some work for a while!! The wall color has been screaming at me to paint over it for a few years now, but I had just never gotten around to it making it happen. A few weeks ago I was at Menard’s and I used the Pittsburgh Paint and Stain Digital Inspiration Studio to FINALLY start on this project. (Find out How to Choose the Perfect Paint Color, HERE.) I don’t know what took me so long.
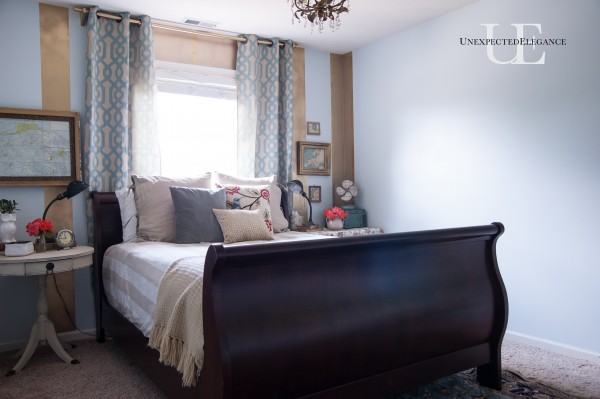
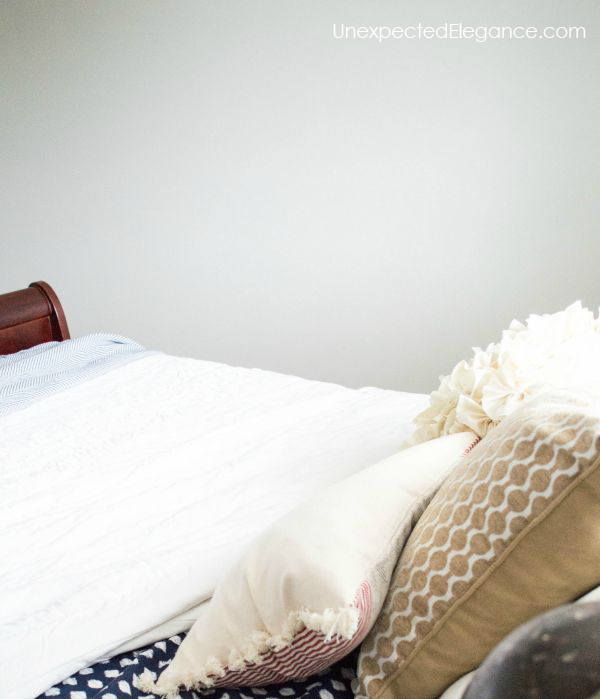
Here’s the room before I started…
I really wanted to give the wall behind the bed some texture. I walked the aisles of the hardware store for some inspiration and came up with a few options, but ultimately decided on a faux brick. My biggest fear with the “faux” part of this project, is that….well, it would look faux. I’ve wanted to add brick to an area of my house for a while now and this seemed like the perfect space to give it a try.
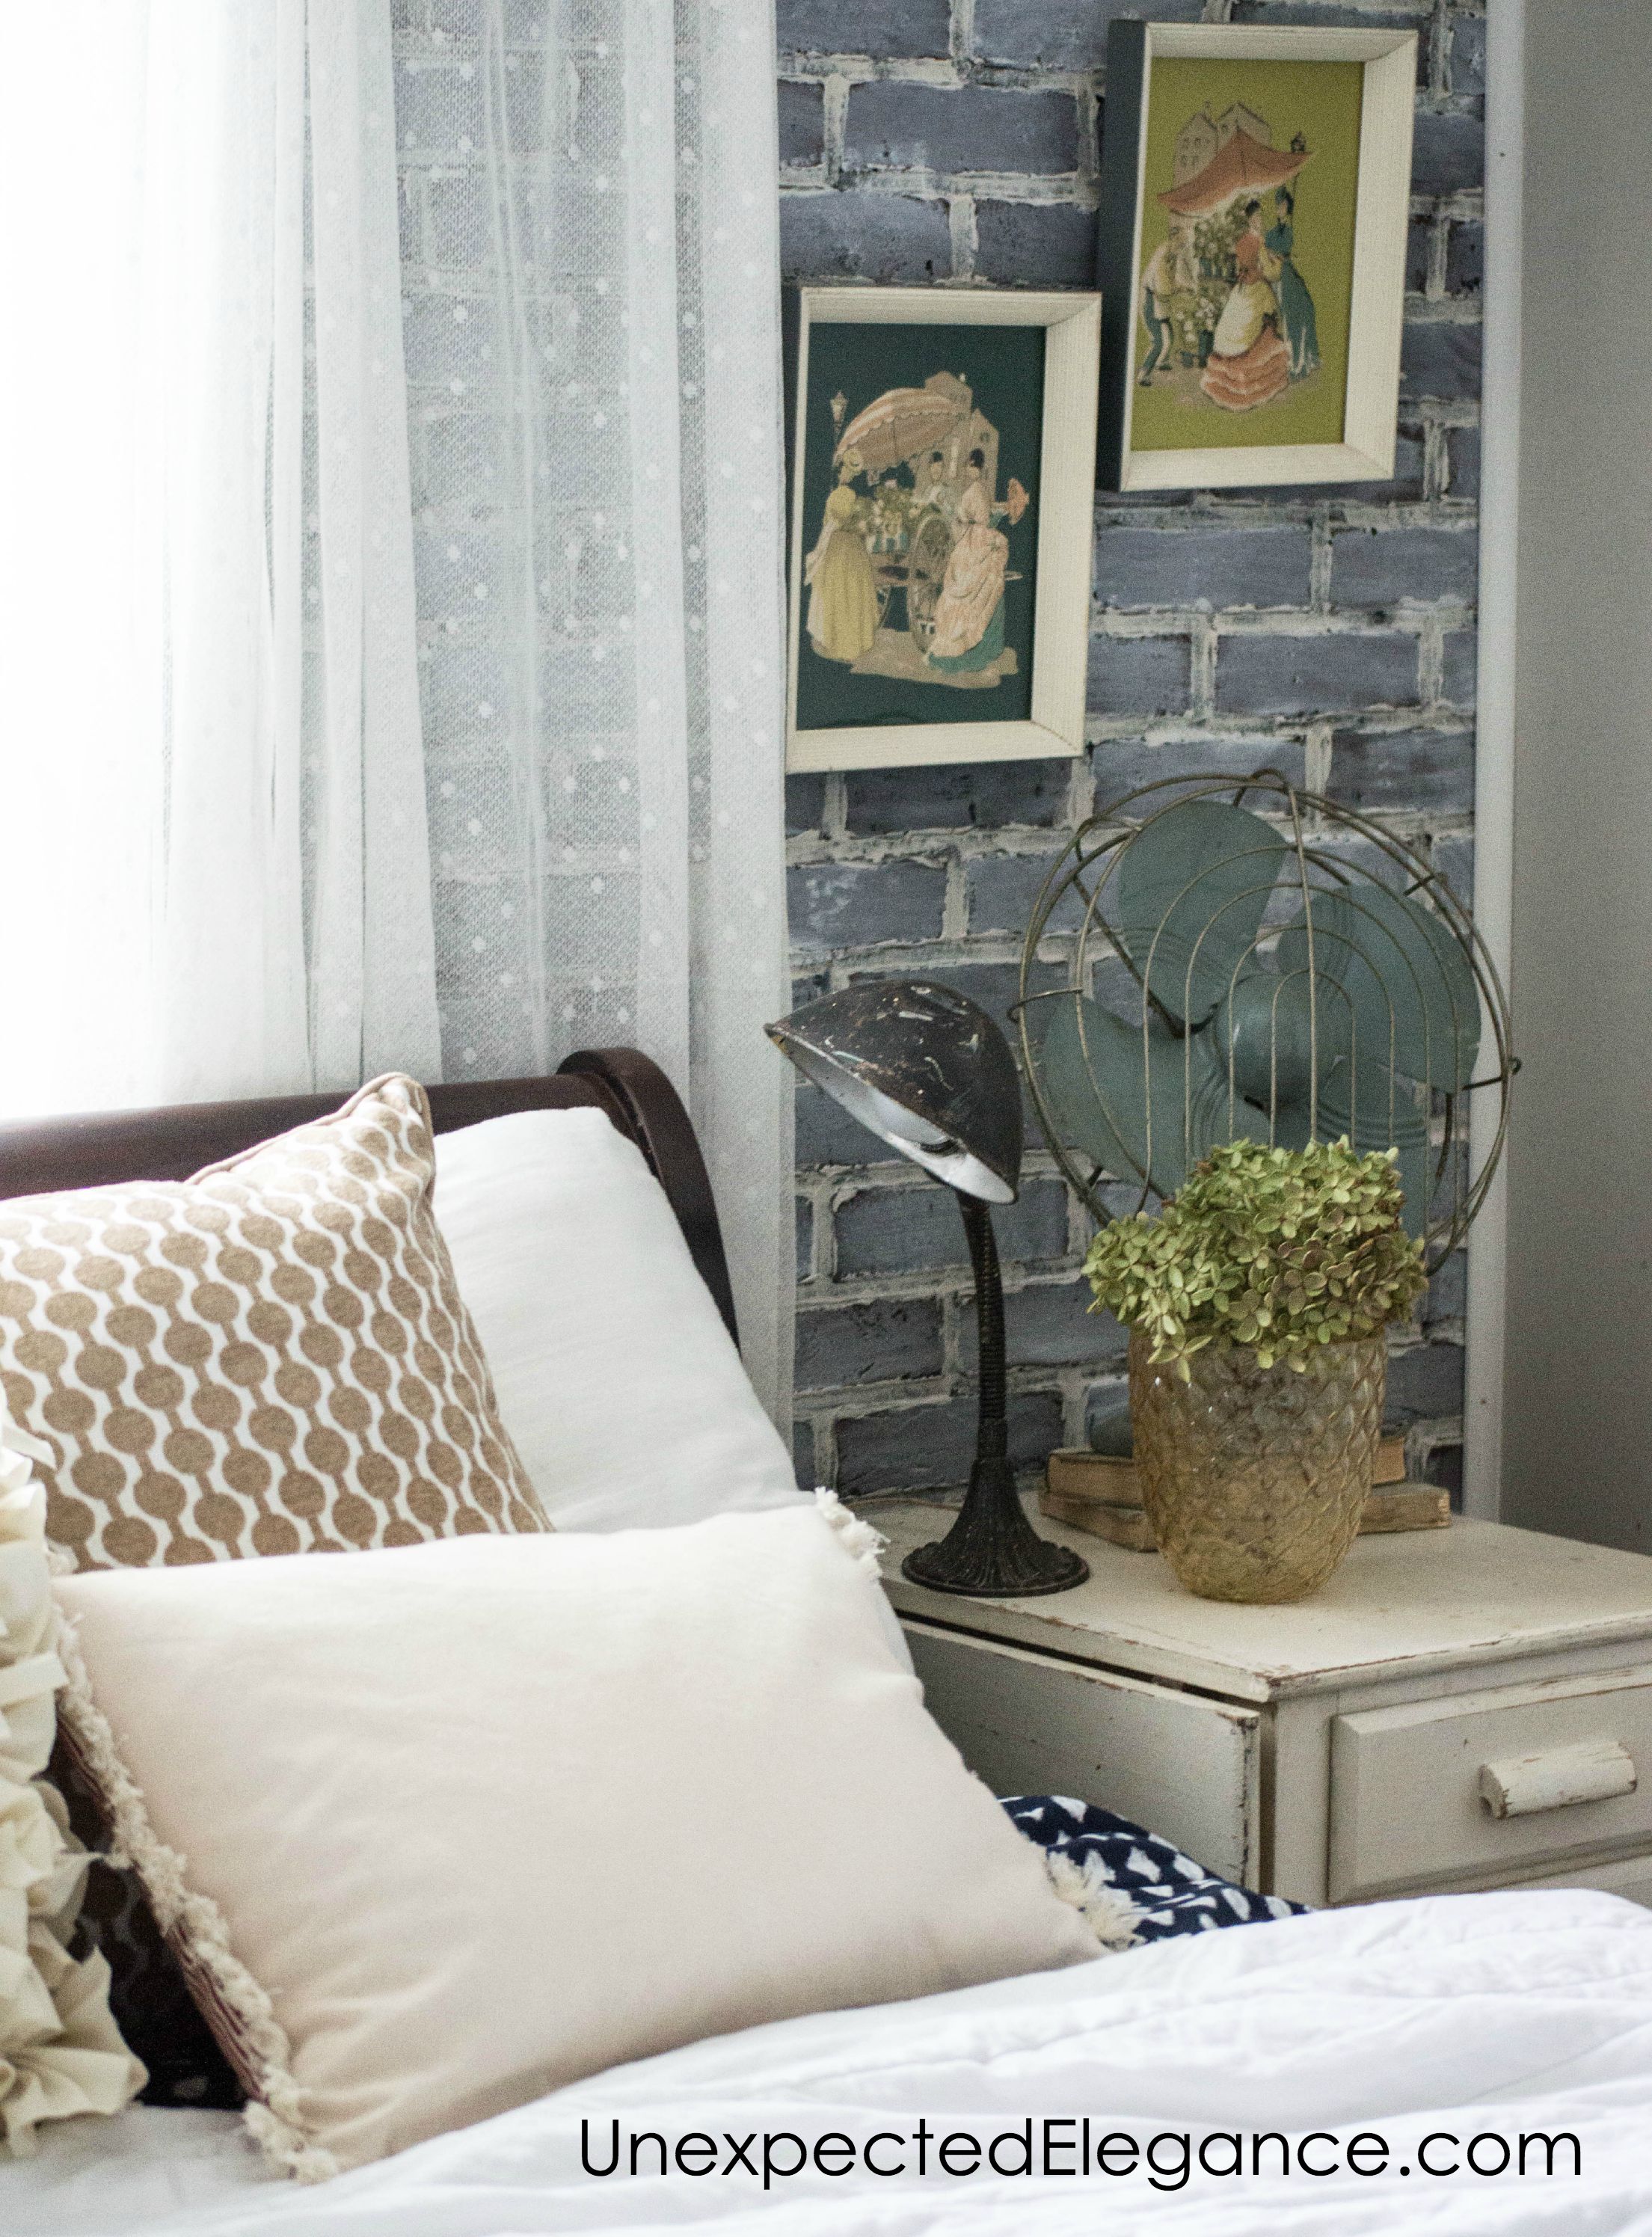
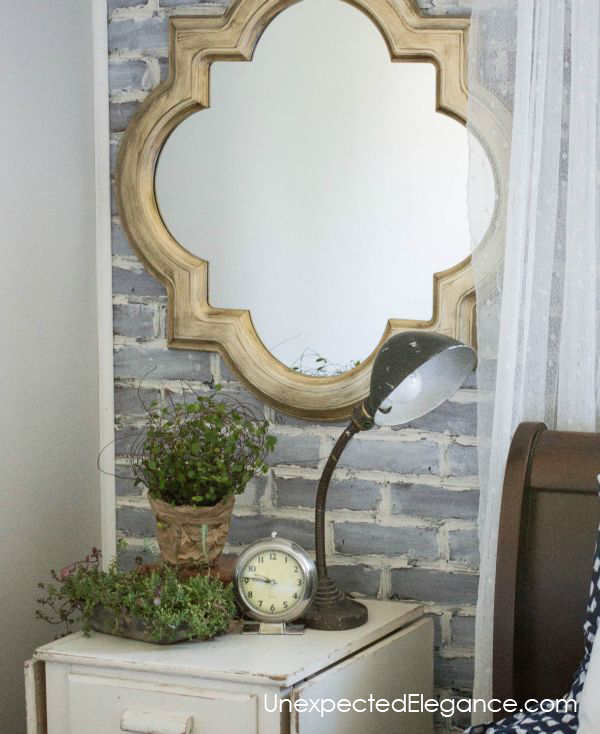
I will say, I’m so happy at how it turned out and honestly you can’t tell it’s not real deal. 😉
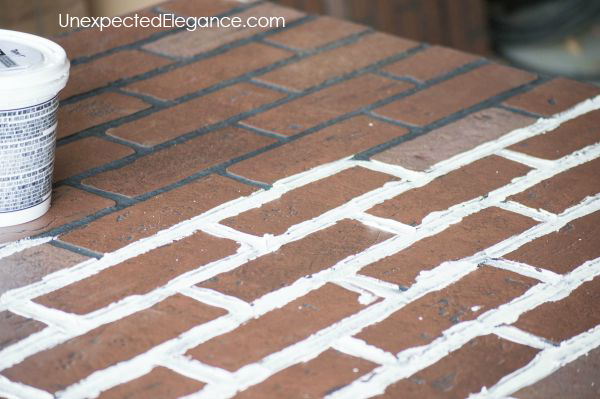
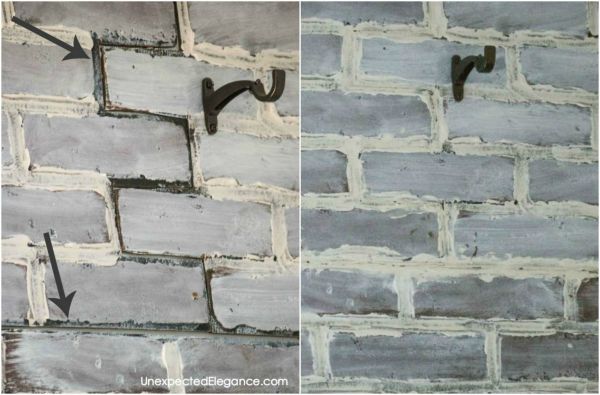
In my opinion, the cuts are the most important part of this project. When I cut the panels I made sure all the cuts were on grout lines. You can see from the picture below how I notched out the bricks and the the full sheet is cut straight on one of the lines. I used a multi-purpose tool for the cut-outs but you can also use a jigsaw. Don’t worry about the imperfections they will get fixed later.
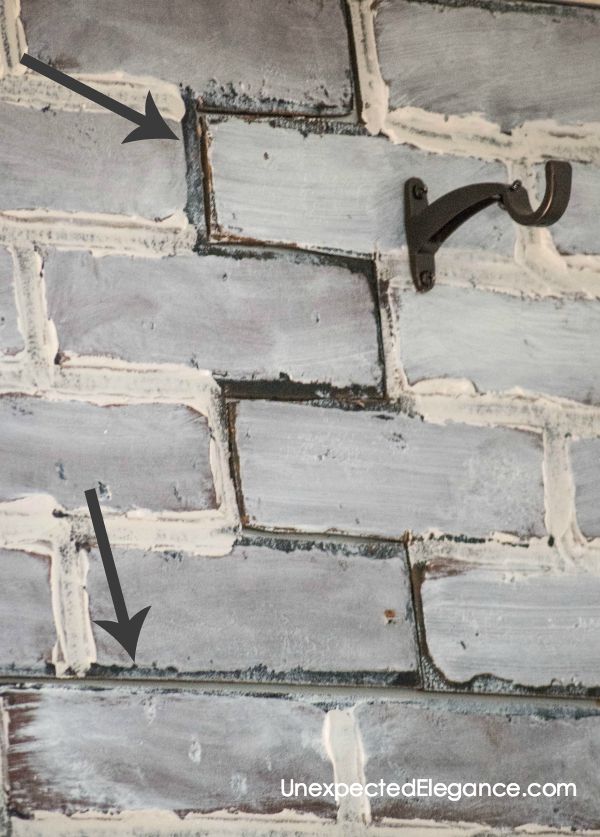
Once the boards were cut, but before they went on the wall, I added some mortar. I started by using pre-mixed mortar on the grout lines of the brick panel. I just used my fingers so it was uneven and looked intentional. (This was a super quick process, but will ultimately depend on how big of an area you are doing.)
I also painted the bricks with a white sample paint from Pittsburgh Paints. I only needed a very small amount of paint for this step of the process. I used a brush with a small amount of paint then wiped most of it off with a rag. Real brick soaks up paint so I wanted it to look as real as possible.
Then I hung all the panels on the wall and filled in the seams with the pre-mixed mortar.
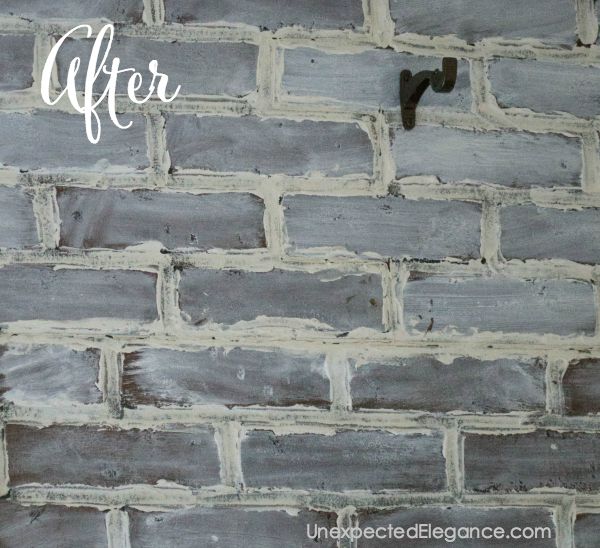
You can see the before and after in the next picture. You literally can not tell where the seams are!
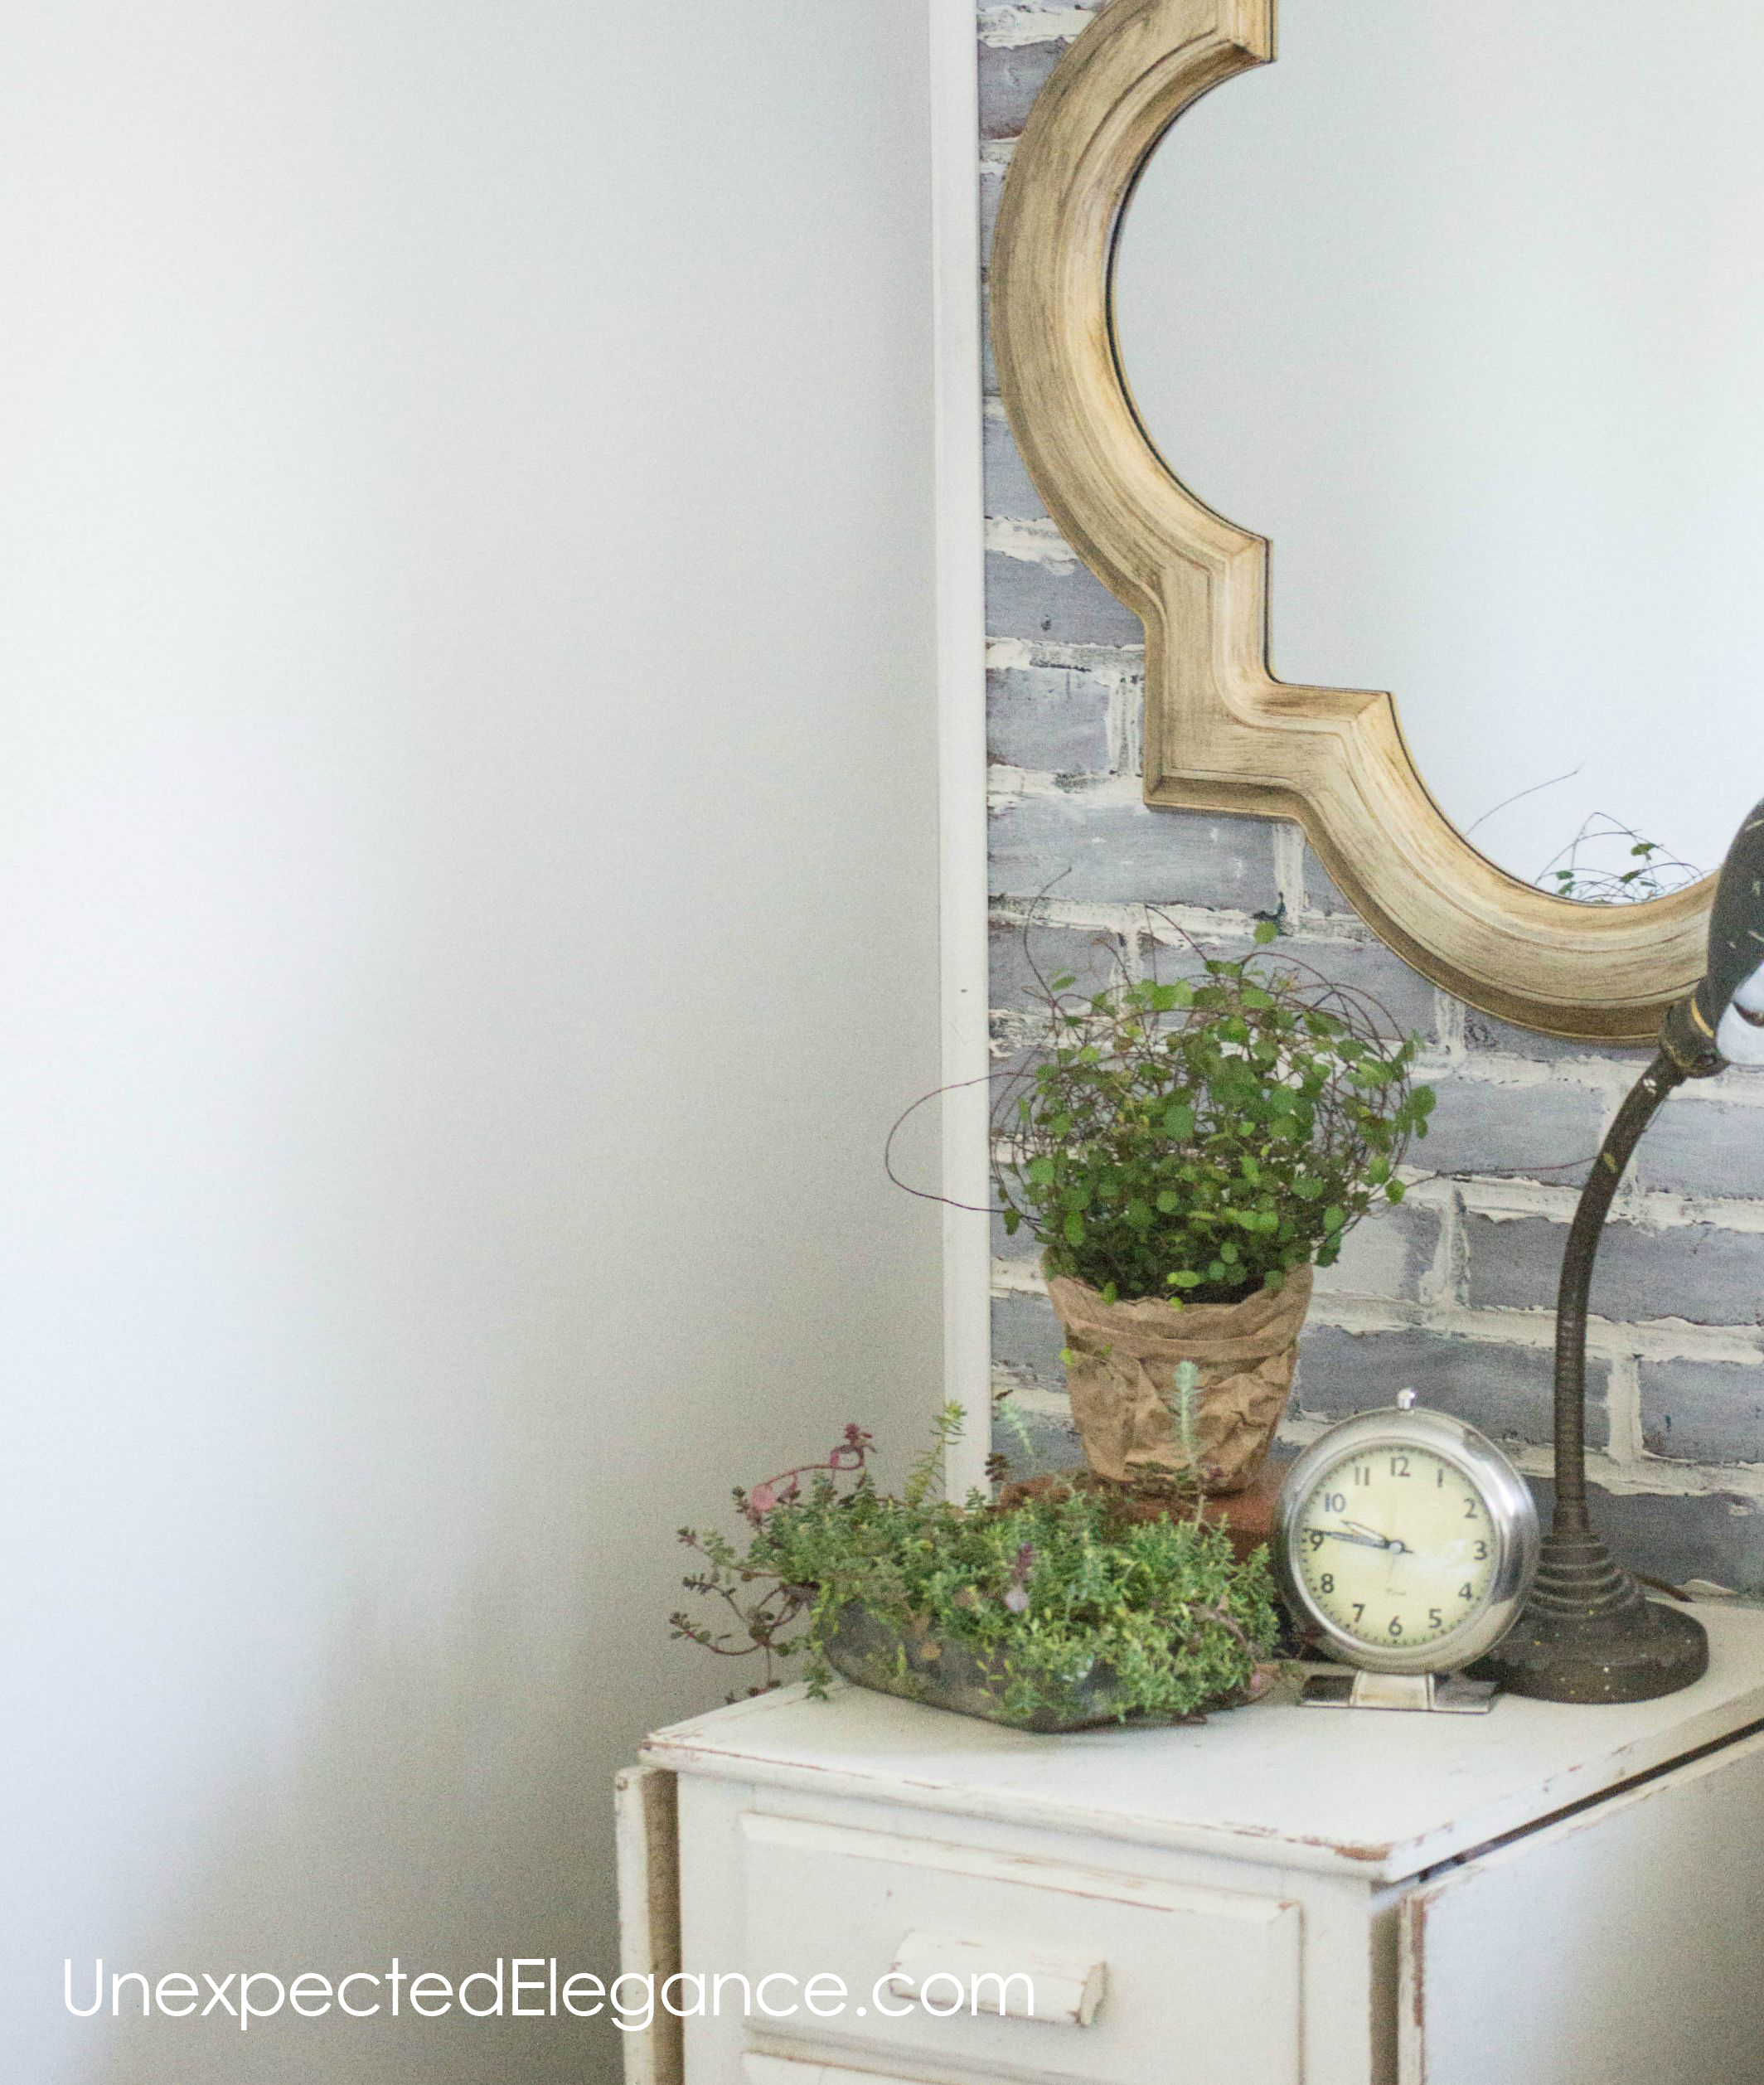
Once the brick wall was finished, I tackled the rest of the room. I had used the Digital Inspiration Studio to help pick the color.
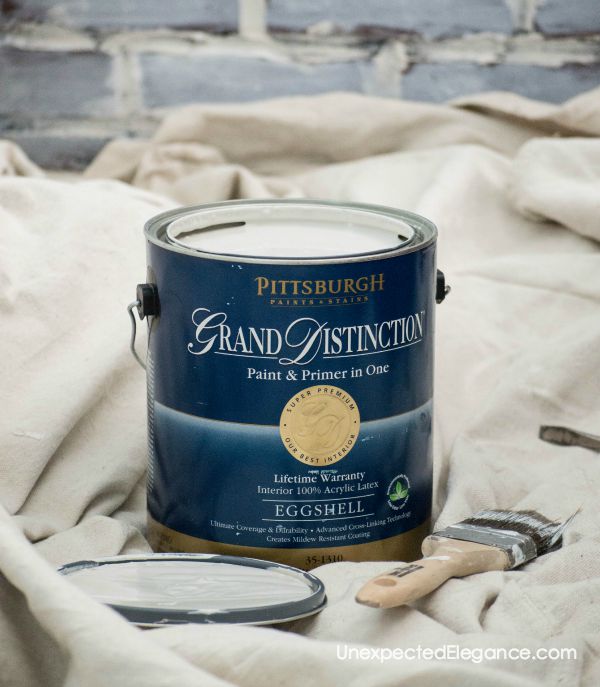
I decided to go with Pittsburgh Paints and Stains, Swirling Smoke, from their Grand Distinction® Paint and Primer in One line. This paint provides outstanding coverage, stain and scrub resistance, and washability. The Swirling Smoke is in the gray color family but has a little bit of a brown undertone.
It turned out beautiful!
I ended up adding some molding to transition between the brick and the drywall.
I love how it turned out!
Check out the full makeover HERE.


This blog looks more like a paint commercial instead of providing details on the actual faux brick
Creating a DIY brick wall adds texture and character to any space. When choosing room colors, opt for warm neutrals or soft greys to complement the rustic brick. Hiring professionals like top-rated painting company, ensures flawless results and color harmony. Their expertise helps highlight the brick’s charm while enhancing the overall aesthetic of your room.
Excellent ideas with DIY Brick Wall and Room Colors, and in this context, it is worth noting jwin7 app download as a platform for fun games where users can learn about bonuses and rewards, which makes using the service more interesting and provides additional opportunities to earn rewards and explore all the features of the site.
Installing an interactive digital wall can elevate how businesses connect with customers and teams. It encourages participation, turning passive viewers into active users through touch and motion features. Brands can display dynamic content, promotions, and real-time updates in an engaging format. Midway through the experience, an Interactive digital wall also supports collaboration during meetings and presentations. It enhances brand image, modernizes interiors, and attracts foot traffic.
While chilling from Portage la Prairie I landed on Claps Casino. Explosive spins come with central energy. Welcome bonus dropped immediately, e wallet payouts in seconds. Top tier protection and 24/7 live chat. For Canadians this means heart racing sessions and massive prizes. Hockey games keep the energy high.
Een vriendelijke groet aan iedereen hier! Ik zat laatst in een koffietentje in Utrecht en hoorde mensen praten over retrozino. Omdat ik wel van online casino bets houd, ben ik diezelfde avond nog gaan kijken. De variatie aan spellen is precies goed. Na een reeks verliezen waarbij ik bijna wilde stoppen, won ik plotseling een serieus bedrag op een van de automaten. Het herstelde mijn saldo volledig en gaf me een voldaan gevoel. Echt een plek die ik vaker ga bezoeken.