
Halloween seems to sneak up on me every year!! I have never been a huge fan of the holiday, but since my kids have gotten older I have given in and we do some decorating and a few crafts every year. I like quick changes for Halloween that are cheap…because I only leave these decorations up for two weeks tops.
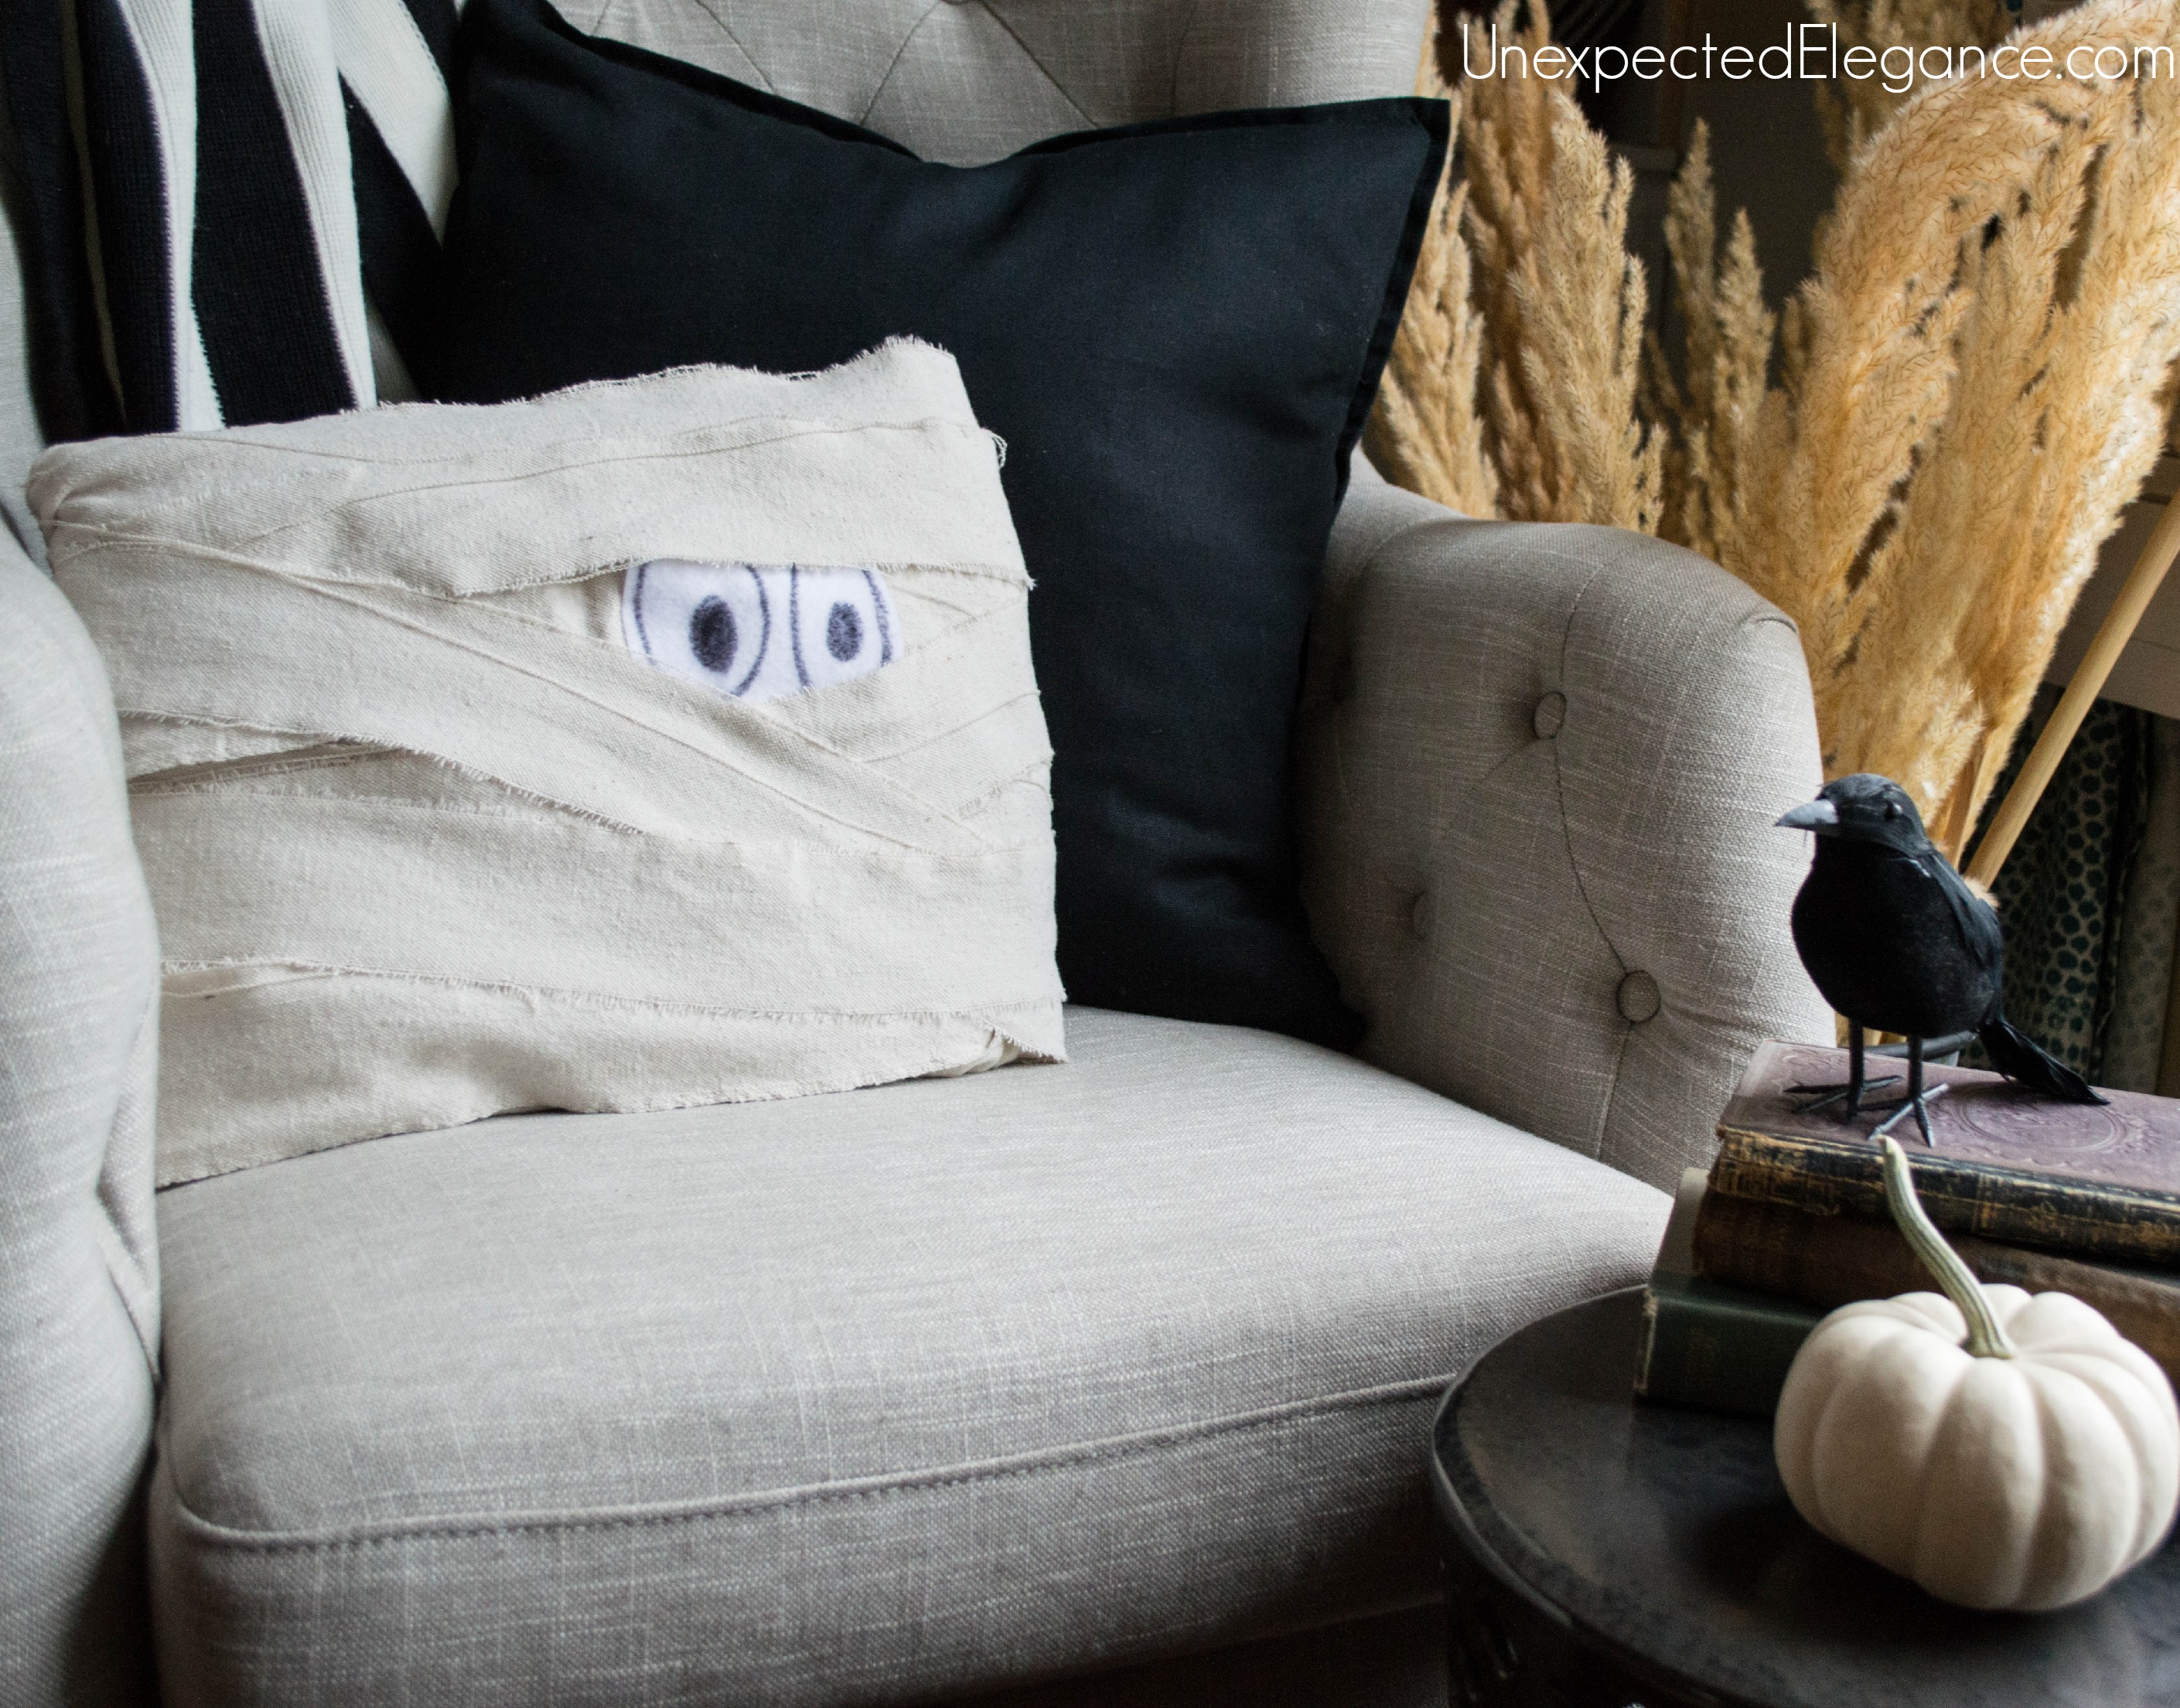
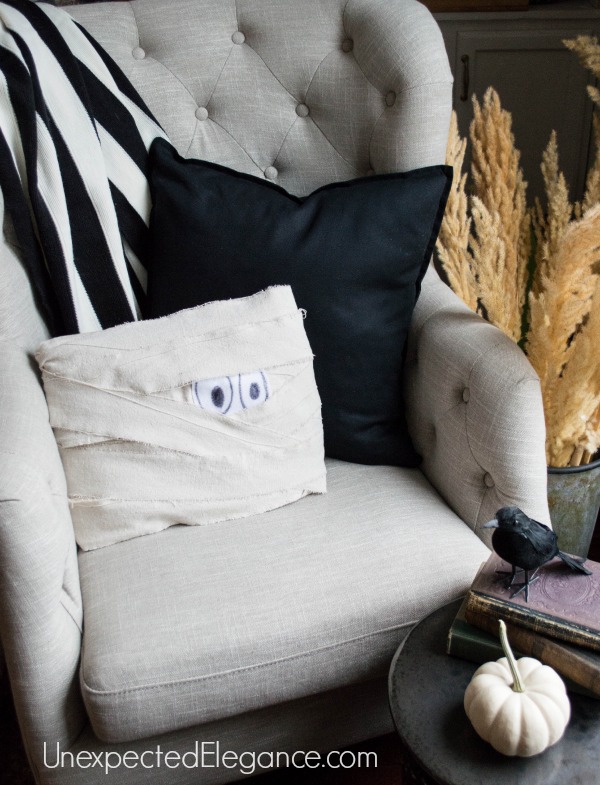
This DIY MUMMY Pillow is one of my favorites!
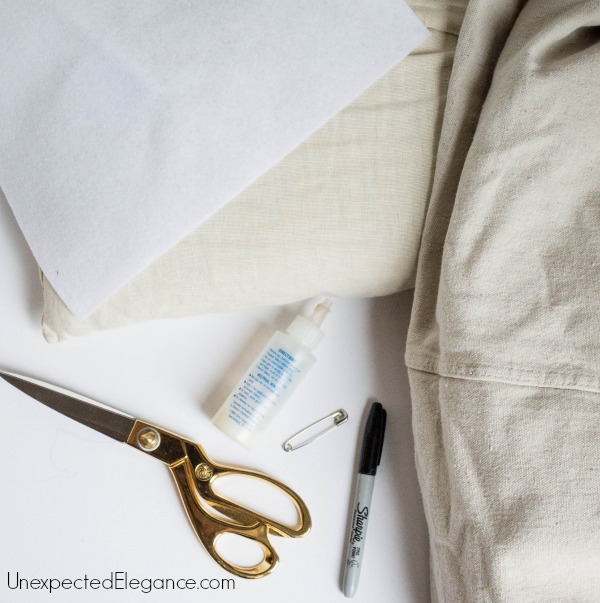
Supplies:
- small pillow (preferably white or off-white)
- light colored fabric (I used a drop cloth)
- scissors
- black marker
- a few safety pins
- Optional: white felt and fabric glue
Steps:
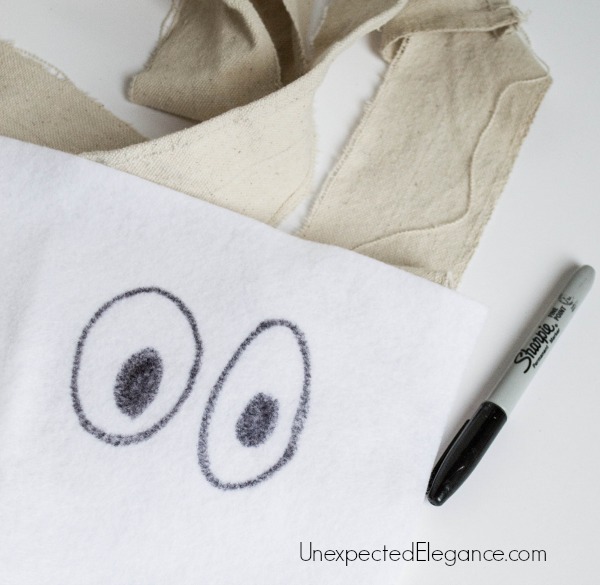
- Start by cutting the fabric into a few long strips. (It’s best to “rip” the fabric strips.)
- Completely wrap the pillow in the strips and use safety pins to secure it on the back.
- Now use the black marker to make large eyes or draw them on a piece of white felt and cut out. (The white felt helped them stand out a little better, but you might need to use a little fabric glue to hold them in place.)
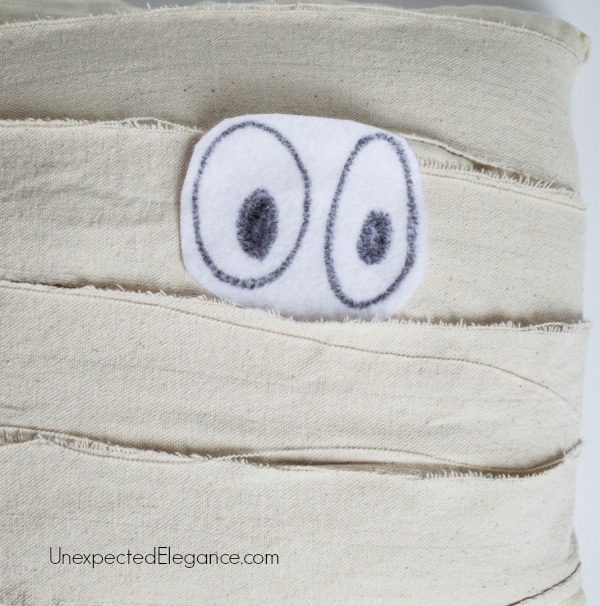
4. Finally, wrap a second layer of fabric around the pillow and leave a small opening for the eyes to “pop” out! Secure the ends with safety pins and you’re finished.
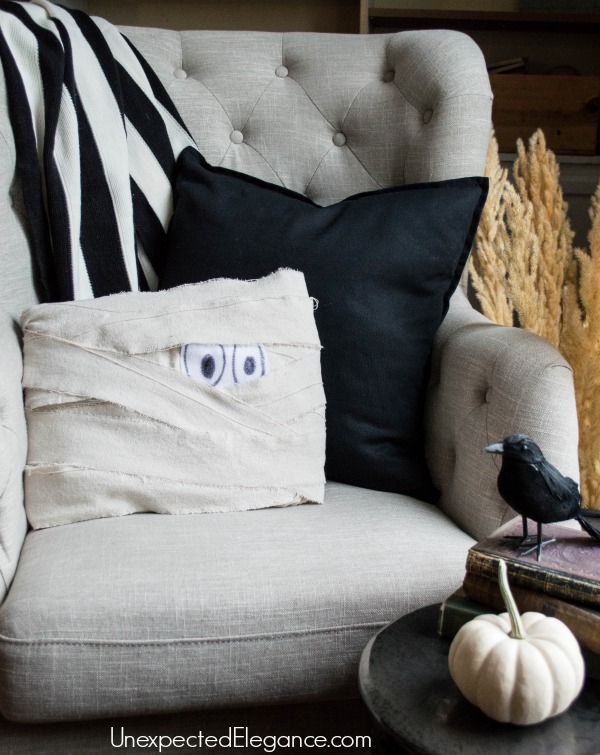
I had all the supplies, so this project was free and only took about 10 minutes to put together. It’s a fun little addition and can be easily removed after Halloween.
Be sure to check out more quick and easy Halloween crafts, HERE! 🙂


How cute!!! That is quick and cute and the kids would LOVE it! xo Diana
This is such a clever and simple Halloween craft! I love how quick it is to make—perfect for a last-minute spooky touch. The mummy design is adorable! Thanks for sharing this idea!
What do you think about more halloween wallpapers?
Made me LOL! Fun and cute. Still smiling. Well done.
Thanks!
That is a scream! You tickled the —- out of me!
Are there any tips or variations to personalize the MUMMY Pillow? I’d love to hear about other creative ways to make it even more spooky or unique.
How cute!! I love this quick idea!! Thank you for sharing!
This article has been really useful. I value your generosity in making it available to me and the public at large.
five nights at freddy’s
Wrap yourself in comfort with the Mummy Pillow – it’s like a cozy nest for peaceful nights. The clever design gives you that extra snug feeling. And hey, if you’re diving into innovation management studies, check out some interesting innovation management thesis topics for a deep dive into the exciting world of fostering innovation in organizations.
This is good, i love this quick idea but I think it would be better to choose an updated service for the new year.
Love this quick and budget friendly Halloween craft idea. The mummy pillow looks adorable and I appreciate the simplicity of the tutorial. Can not wait to try it out with my kids.
Auto Detailing Services Experts in Muskogee OK
The 10 Minute Halloween Craft | Mummy Pillow sounds like a fun and creative project! It’s great to see quick and easy DIY ideas for the festive season. For those looking to delve deeper into crafting or explore related themes, services like “can someone do my dissertation?” could offer valuable research assistance and insights.
Women’s support for sex dolls stems from the growing feminist belief that they can solve their feelings of loneliness by purchasing a realistic, full-size sex doll, and that purchasing a sex doll will also satisfy their sexual desires.
https://www.bestrealdoll.com/collections/full-size-doll
I just wanted to say a big thank you for sharing the 10 Minute Halloween Craft, Mummy Pillow tutorial! This is such a fun and creative idea, perfect for adding a spooky touch to our Halloween decorations. I love how simple and quick it is to make, yet the end result is so impressive. This Halloween do not worry about your online classes and academic burden. affordable online class help is here to solve your problems and make your Halloween enjoyable!
Zayn Venture Capital is a prominent investment and best venture capital firms that actively supports and funds innovative Pakistani start-ups that are revolutionizing various industries through technology. Our primary focus is on early-stage companies, and while we remain open to opportunities in all sectors, we particularly analyze each company through a FinTech lens.
Faisal Aftab founded Zayn Venture Capital, a leading venture capital fund focused on early-stage ventures in Pakistan. He is considered to be one of the most prolific investors with the highest number of notable investment calls in Pakistan.
Explore a diverse selection of vibrator sex toys at Cupidbaba. From discreet bullets to powerful wand massagers, find the perfect pleasure companion for your desires. Enjoy discreet packaging and delivery for your privacy. Shop now!
Ghostwriting Nerds specializes in creating engaging narratives with our expert ebook ghostwriter services. Our experienced writers craft stories that captivate readers and keep them hooked from beginning to end.
kinoger.to können Sie eine breite Auswahl an Filmen und TV-Serien entdecken. Verwenden Sie die Such- oder Stöberfunktion, um die Unterhaltung zu finden, die Sie sich wünschen.
Nursing leaders also play a critical role in promoting a culture of safety and excellence. Patient safety is a top priority in healthcare, and nursing leaders are responsible for creating an environment where safety is valued and prioritized. This involves not only implementing policies and procedures online class assignment that promote safety but also fostering a culture where staff feel comfortable speaking up about safety concerns. Leaders who are committed to safety and excellence set the tone for the entire organization, encouraging staff to take ownership of their work and to strive for the highest standards of care.
The impact of nursing leadership on patient outcomes is well-documented. Research has shown that organizations with strong nursing leadership tend to have better patient outcomes, including lower rates of infection, medication errors, and patient falls. This online class help services is likely due to a combination of factors, including better communication, more effective teamwork, and a stronger focus on safety and quality. Nursing leaders who are able to create a positive work environment, foster collaboration, and promote a culture of safety are more likely to see improved patient outcomes.
Gaining Insight Through Psychology Writing
Psychology writing plays a vital role in helping individuals gain insight into human behavior, mental processes, and emotional states. It serves as a medium for exploring complex psychological concepts, breaking down theories, and applying research to real-life situations. Through psychology writing, both professionals Psychology writing Services laypersons alike can deepen their understanding of the mind, improve self-awareness, and facilitate personal and professional growth. This article explores how psychology writing helps in gaining insight, the different types of psychology writing, and its impact on personal development, therapy, education, and research.
Understanding Insight in Psychology
Insight, in psychological terms, refers to the capacity to gain an accurate and deep understanding of a person or situation. It involves self-awareness, the ability to recognize patterns of behavior, and the realization of unconscious influences. In therapy, insight often marks the turning point for many individuals, leading them to better comprehend their emotional states and the underlying reasons for their struggles. Psychology writing, whether through academic research, self-help materials, or clinical case studies, acts do my Psychology assignment a vehicle for delivering this type of understanding.By writing about psychology, authors engage in an analytical process, dissecting behaviors, emotions, and cognitive patterns. The act of writing itself promotes clarity and reflection, allowing the writer to organize thoughts and distill complicated concepts into more digestible forms.
Provision Paving and Masonry is an expert asphalt maintenance company that provides comprehensive services to ensure the longevity and durability of asphalt surfaces. They specialize in a variety of maintenance solutions, including sealcoating, crack filling, patching, and resurfacing. These services help protect asphalt from the damaging effects of weather, UV rays, and heavy traffic, preventing costly repairs down the line.
Thank you for producing such a fascinating essay on this subject. This has sparked a lot of thought in me, and I’m looking forward to reading more.
A construction estimating services company specializes in providing accurate cost assessments for construction projects. These companies help contractors, architects, and property developers by preparing detailed estimates for labor, materials, equipment, and other project expenses. Their expertise ensures budget efficiency, minimizes financial risks, and supports informed decision-making throughout the construction process. With advanced tools and experienced professionals, they deliver precise estimates tailored to each project’s specific requirements, helping clients stay on schedule and within budget.
Looking to bypass restrictions and unlock premium features? Lucky Patcher allows you to customize apps and games, giving you a more flexible and personalized experience.
This website canary wharf escorts impresses with its modern design and easy navigation. It’s responsive across all devices, ensuring a smooth experience. The visuals are high-quality, and the color scheme is well-balanced. Content is clear and easy to find, and the site loads quickly. Interactive features enhance engagement without distraction. Overall, it combines style and functionality seamlessly.
Create a spooky Mummy Pillow in just 10 minutes with this fun Halloween craft! Perfect for last-minute decor, it’s a quick, easy, and festive DIY project. Use a Prosenttilaskuri to calculate the material needed to make multiple pillows for your Halloween party!
baby care games for kids
https://www.kidsal3ab.fyi/
Doodle Baseball is a fun online free game that celebrates America’s favorite pastime with a playful twist! This no download need browser game works instantly—just open the page and start swinging
https://doodle-baseball.cc/
Poor Bunny is a fun online free game that you can play right in your web browser! You don’t need to download anything – just click and start playing!
Wacky Flip is great for quick fun or deep skill challenge. Always something new.
https://wacky-flip-8ah.pages.dev/
Sehr kreative und schnelle Idee! Die “Mummy Pillow” Anleitung ist super einfach umzusetzen — dank solcher DIY-Tipps sieht das eigene Zuhause aus wie ein kleines Kunstwerk. Chat GPT Deutschland wäre stolz auf diese Inspiration!
This DIY Mummy Pillow is such a cute and simple Halloween craft! I love how it transforms an ordinary pillow into spooky décor in just minutes. It actually reminds me of the fun creativity behind a meme soundboard—both take something ordinary and give it a playful twist that makes people smile. Just like the pillow adds character to your Halloween setup, a meme soundboard adds humor and personality to everyday moments.
Love this quick DIY Mummy Pillow idea! Perfect for a 10-minute Halloween craft. I often use Chat GPT Nederlands to find more easy and fun Halloween decorations like this one.
Interbet’s Vegas bonus matches 100% up to R1,000—R200 via Ozow got R400 total at 7:52 PM, rolled 20x on R10 blackjack hands, hit natural 21 three times for R720. Evolution streams crisp, no lag on 4G. Username reset SMS’d in 20 secs last week. Withdrew R1,050 to Nedbank at 10:03 AM, in by 11:41. Tailored kickoff at Interbet Clear tables first—slots spike rollover variance.
Etter å ha lest mange sportsnettsteder, er https://norskebettingsider.tv/
den jeg stadig kommer tilbake til. De har en ryddig layout, gode bilder og velskrevne artikler. Det er tydelig at de har fokus på kvalitet fremfor kvantitet. Nyhetene føles ekte og relevante. En side som skiller seg positivt ut fra mengden.
Among the online gaming platforms I’ve tried, Mahadev Book is one of the best. Setting up my Mahadev Book ID was effortless, and the Mahadev Book Login is quick and secure. The platform runs smoothly, and the Mahadev Book App makes it easy to play and track games on the go. Highly recommended for anyone seeking a reliable and user-friendly gaming experience: https://mahadevbook.co.in/
Payless Bath Makeover specializes in transforming bathrooms with expert design and installation services. They offer a wide range of solutions including full remodels, shower and tub replacements, conversions, walk-in tubs, and accessible shower systems. With a reputation for craftsmanship and attention to detail, they use top-quality materials like quartz, porcelain, and custom wall panels to deliver lasting results. Backed by decades of experience, free consultations, and financing options, Payless Bath Makeover helps homeowners achieve stylish, functional, and affordable bathroom upgrades.
I absolutely love this DIY Mummy Pillow idea! Halloween has never been my favorite either, but quick and fun crafts like this make decorating so enjoyable. I followed the steps using an old white pillow and some scrap fabric I had lying around, and it literally took me about 10 minutes. The eyes really bring it to life, especially when using felt with a bit of glue. It’s such a playful addition to the house and perfect for a short-term decoration. Honestly, projects like this even inspire me to try creative online interactions, like roleplaying fun here, to keep the Halloween spirit going.
I didn’t realize at first that they offered sports betting until I saw the specific tab for it. I checked the odds on https://only-spins.net/ and they seem competitive for the major leagues. The interface looks clean and lists the games clearly without too much clutter. I am curious if they offer fast settlement for live bets. It is really frustrating when you win a bet but have to wait hours for the funds to be available for the next wager.
I really like how they turned a regular pillow into such a cute decoration for the house for the holiday. By the way, not long ago I played Halloween Jack on the glory casino bangladesh . The game is also Halloween-themed. I liked it so much that I couldn’t tear myself away from it. and in general, there are a lot of slots here on various holiday themes, and the graphics are simply amazing, as if you are immersed in a world of magic, and the special effects are a separate kind of pleasure, and most importantly, they bring good benefits. The platform itself operates under license and honestly, and you can replenish your account from any payment system, which is just wow. So if you also want to immerse yourself in a world of magic and wonder, head over to the platform!
Love this idea! Quick, budget-friendly Halloween crafts like the 10 Minute Mummy Pillow are perfect when you only decorate for a short time—simple, fun, and kid-approved without the stress. For more creative ideas and helpful resources, be sure to visit our website and check out Kisskh Alternatives for extra inspiration!
Such a cute and simple idea! I love 10-minute crafts because my kids have short attention spans. We usually alternate between quick crafts like this and little browser games on Funboxie (https://funboxie.com) to keep them entertained on rainy days. Thanks for sharing!
From my perspective as an active trader, consistency matters more than flashy marketing. I discovered Exness through https://ex-trading-pakistan.com/ and decided to compare it directly with two other brokers I was using. What I noticed immediately was the competitive spread structure and the fast processing of deposits and withdrawals. The platform performance during high impact news events has been steady for me, which is crucial in forex. I also like that Exness offers multiple account options so traders can adjust according to their capital and strategy. So far, my experience has been professional and dependable, and I plan to continue building my trading routine with them.
The Mummy Pillow is such a cute and quick craft! I love that it’s a perfect last-minute decoration, especially because you just need some basic supplies like a pillow and fabric. Who knew creating such an adorable Halloween touch could be so easy?
Discover Telugu Andhra Pradesh Matrimony and Reddy Matrimony profiles with Free Registration. As a leading Free Marriage Bureau, we offer a Wedding Match for only ₹199. Trust the Best Matrimony Site for your Shaadi and Online Matrimony needs.
The 10-Minute Mummy Pillow is a wildly popular, budget-friendly DIY Halloween craft praised for its extreme simplicity, making it a perfect last-minute holiday project to do with kids. Because it relies on transforming existing throw pillows rather than sewing a new one from scratch, it requires minimal cleanup and can be easily disassembled after the spooky season ends.MobiFlix APK
Creative and easy Halloween craft idea that looks fun for families and DIY enthusiasts. Simple projects like this inspire creativity, just like staying updated with number coding window hours for better daily planning.
I’ve been sharing a few of these cozy DIY home styling ideas and quick crafting tutorials on my social feeds to inspire other interior design enthusiasts in our local community groups. Using reliable apps for reposting Instagram content makes it completely seamless to mirror these aesthetic holiday layout clips and reels directly onto our grids, ensuring the step-by-step text overlays stay perfectly crisp and readable for everyone looking to try it themselves.