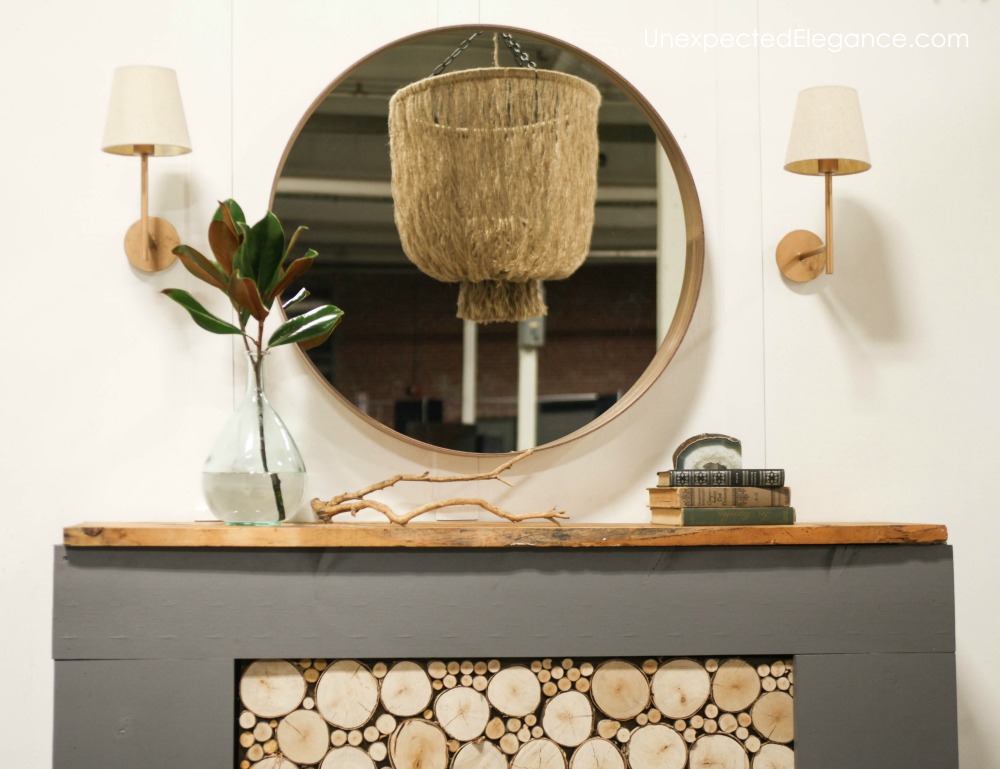
Sometimes the design in my head doesn’t always fit with the money in my wallet…can I get an amen?!? In times like these, I generally have to get creative and figure out a way to make something similar to what I have envisioned for the space.
So when I started working on my space for the Indy Home Show, I wanted a large and unique chandelier…and I found the perfect one (HERE). The problem was the price tag was almost $2500 (gulp)…let me just say that will NEVER be in my budget.
I searched the house and found almost all the supplies I needed to make a knock-off. I decided to use juke twine, but if you wanted it closer to the original you could use a cotton twine.
TIP: You can make this as large or as small as you want, depending on the size of hoop you get.
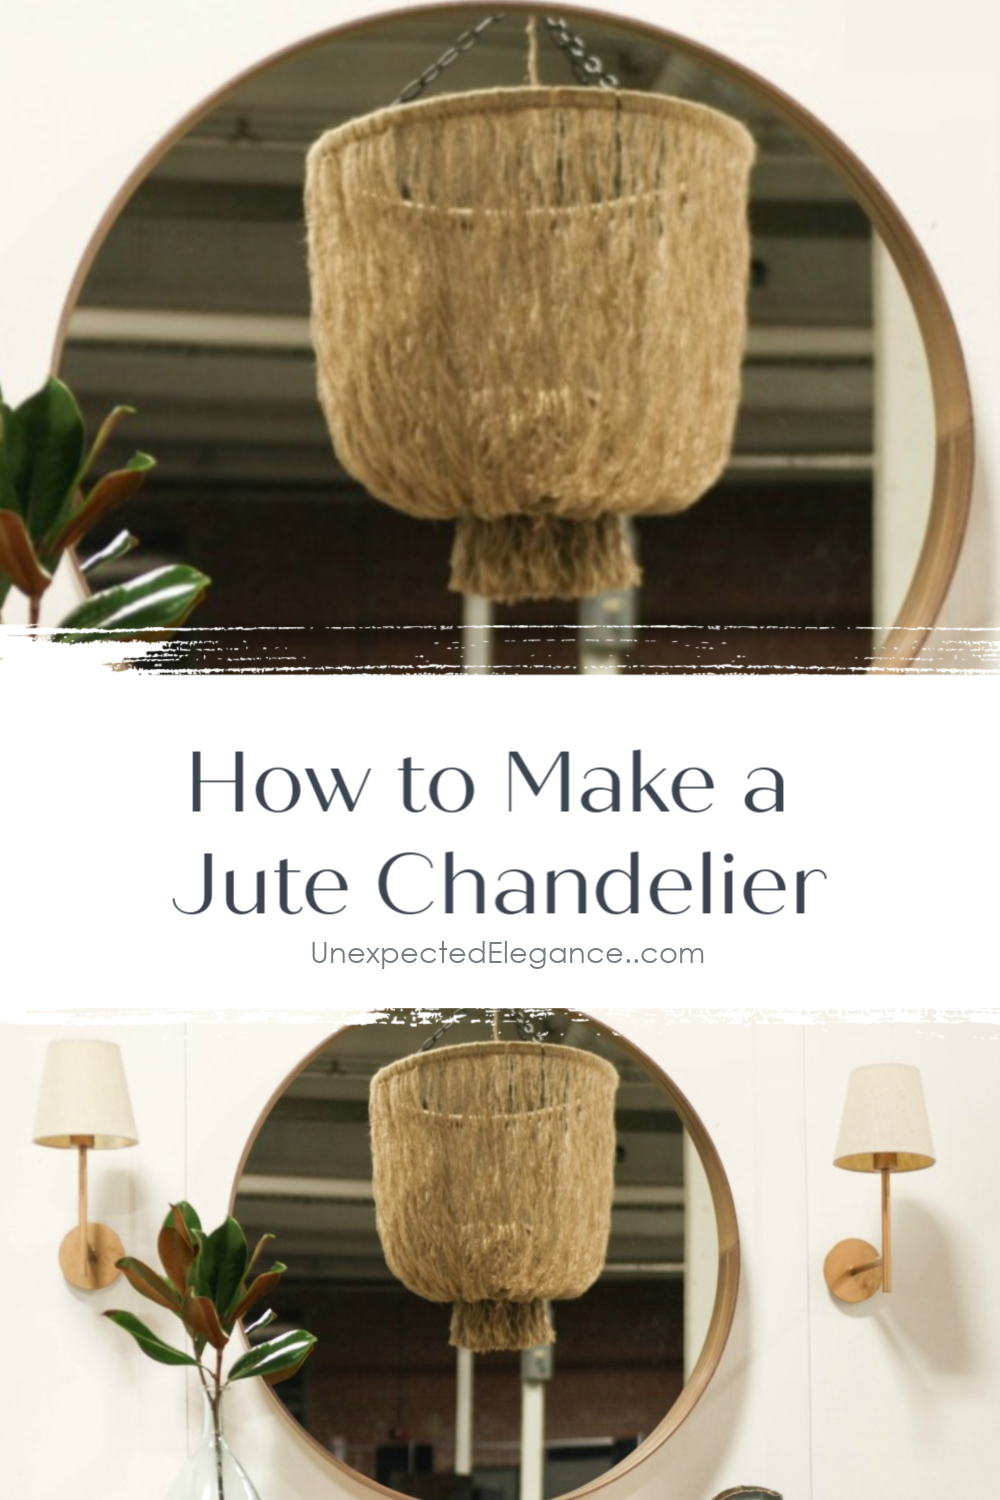
How to Make a Chandelier
DIY Jute Chandelier Supplies:
- jute twine (this will depend on how full you want it and how big) I used (15) 190 ft. rolls.
- embroidery hoop I used a 23″ hoop.
- light kit (hardwired/canopy or plug-in)
- scissors
- chain
- small plastic cup
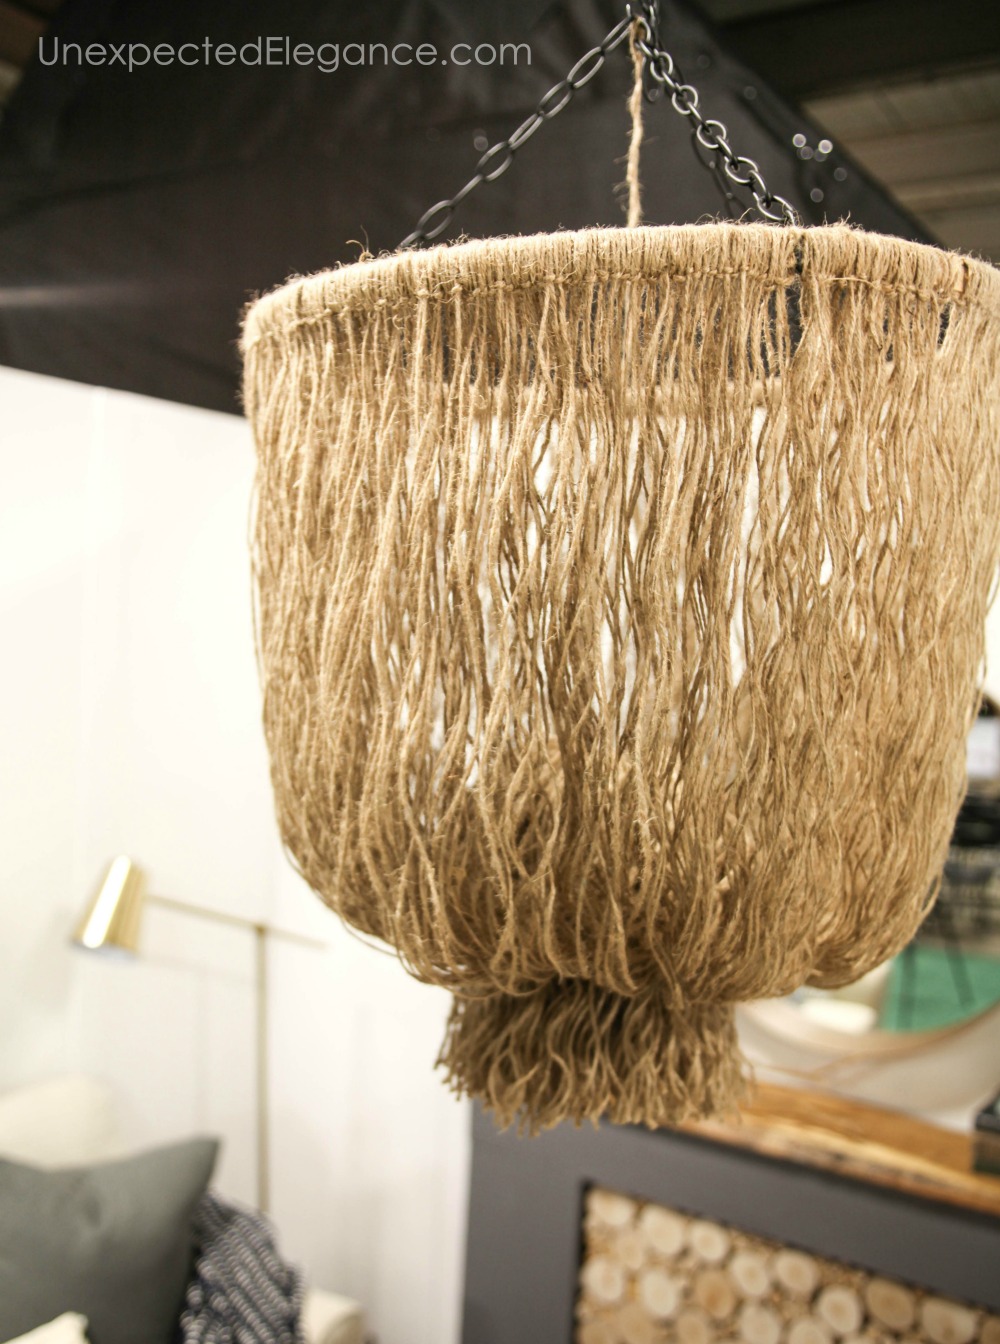
Step 1: If you have a place to hang it and work, that is your best option, otherwise just start attaching the twine. I cut really long pieces, around 6 feet each, because I wanted it to be pretty long.
Step 2: Fold the cut piece of twine in half, loop it around the embroidery hood, and pull in through. Check out the picture below for clarity!
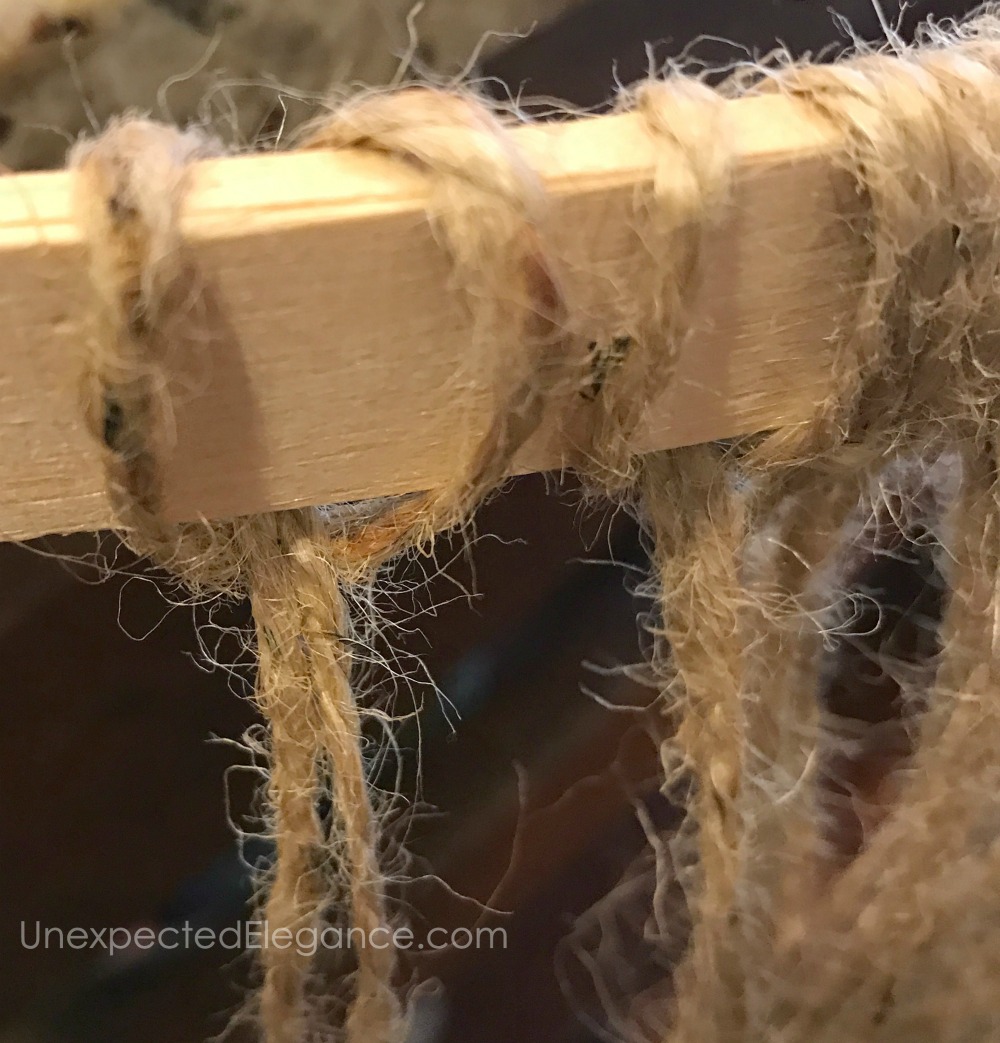
Continue doing this until you have the hoop completely covered. This will take you a while, so I did it while watching TV in the evening.
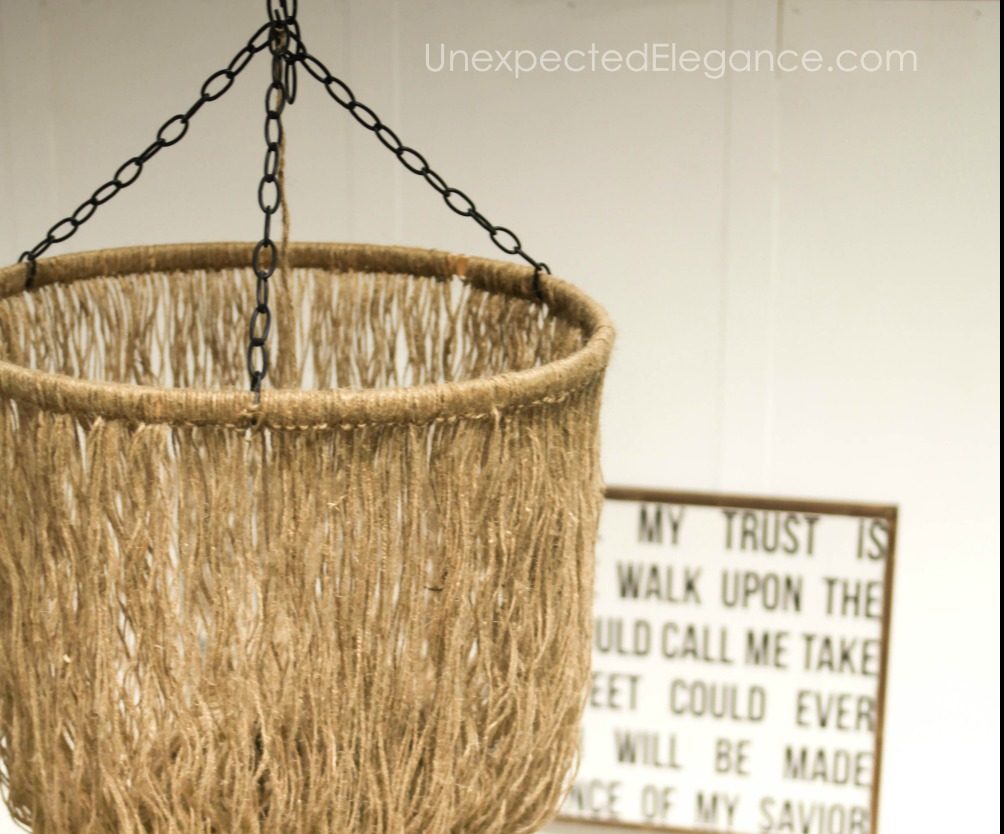
Step 3: Measure out equal distant around the hoop and attach a piece of chain. You can either do 3 or 4 piece of chain coming off the hoop, but you want to make sure each one has the same amount of links.
I did 3 sections of 11 links.
Then attach each of those to another chain that will go all the way to the ceiling.
Step 4: You will need something round for this next step. I suggest a plastic cup.
Make a small hole in the bottom of the cup and then attach a long string from the cup to the top of the chandelier. The cup will be hanging upside down.

Step 5: Take a piece of twine and tie it tightly right above the cup. It should look like the photo below.

Step 6: Then use that string to raise the cup up into the center.
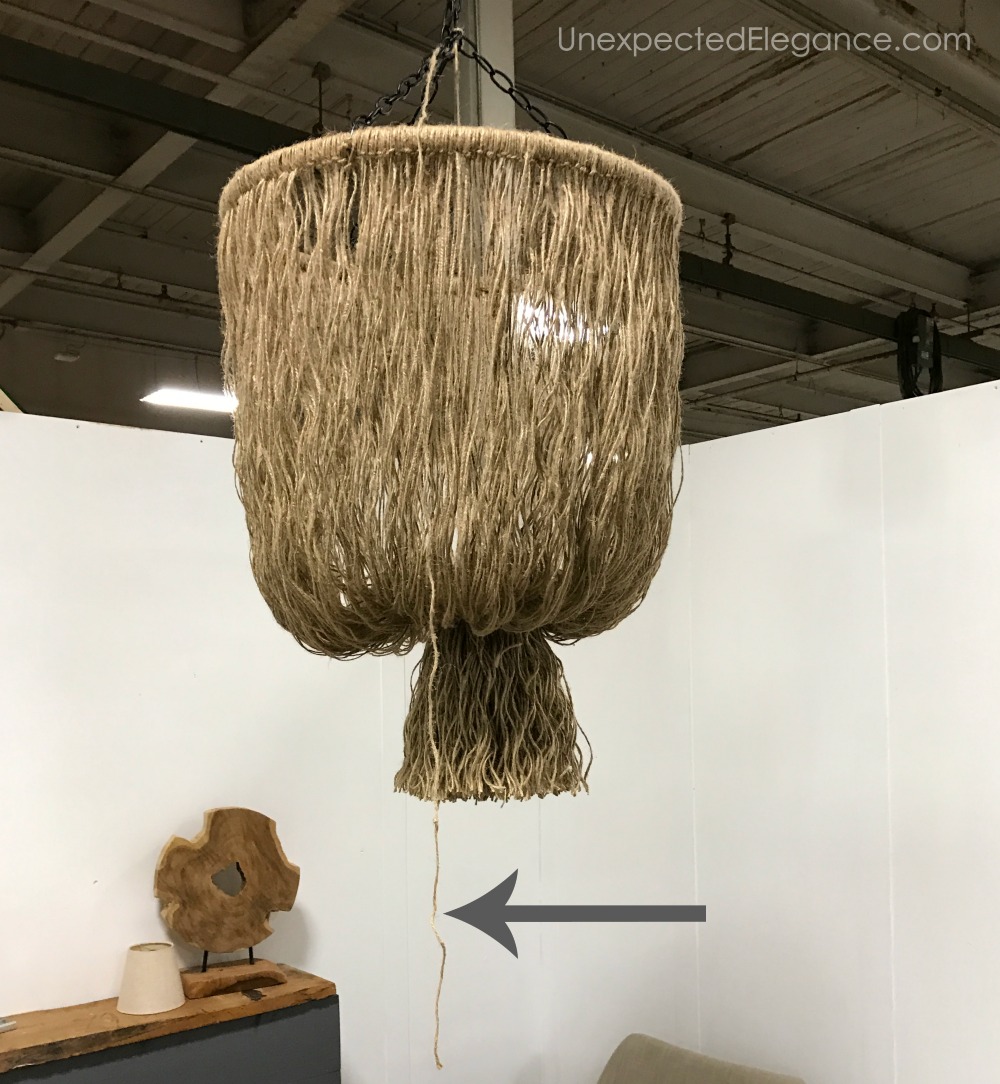
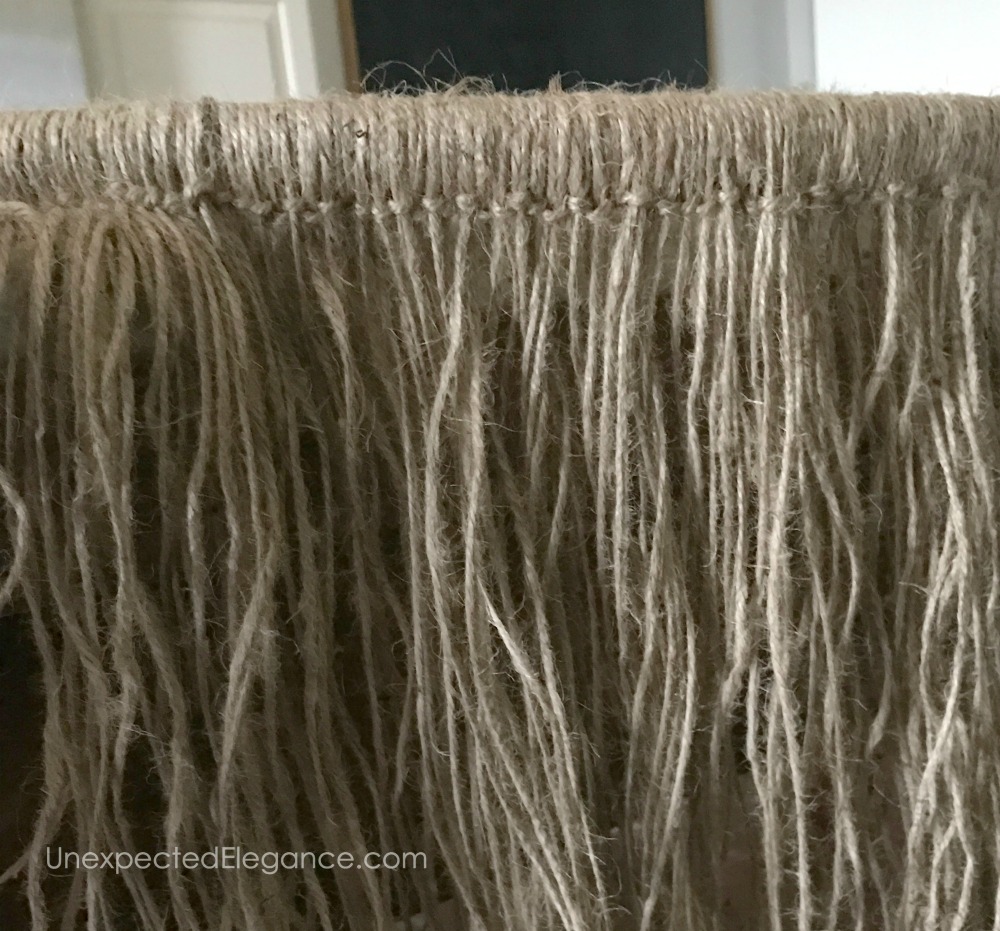
Step 7: When you have it the way you want it, tie the string on the chain and trim the fringe to look uniform.
Step 8: Finally, add in your light kit to the center and your done! I don’t have the light kit in mine for the Home Show, but I’ll add it when I install it at my house.
What do you think? Is my knock-off a good alternative? The only thing I had to buy was twine, so I spent around $30…a $2420 savings!
For more ideas, check these HOME DECOR TIPS!


This is the best DIY Chandelier I’ve ever seen I can’t wait too see it when it’s lit up with a light bulb!
Thanks for sharing
Thank you!!
Oh, I totally feel you on that! Sometimes, I have these awesome design ideas swirling in my head, but my wallet just doesn’t match up. It’s like, I’m all set to create this amazing space, but then reality hits, right? So, I’ve learned to get really creative with my decor. . It’s kind of like tackling a cheap law assignment you got a get resourceful and make it work with what you’ve got!
This DIY jute chandelier project reflects creativity and sustainability well. In addition to these artistic types of crafts, I read about a law case study writing agency that used detailed analytical approaches in crafting it—both projects involved deliberate design.
Making a DIY Jute Chandelier is like creating your own special light decoration. It’s super cool and you won’t believe how easy it is! All you need are some simple materials like jute, a bit of creativity, and maybe even a cricket ID.
Transform your space with a stunning DIY Jute Chandelier project, with guidance from coursework writers in Dubai. Elevate your home décor with this stylish and eco-friendly lighting solution.
Rholab, the pioneering force in ecommerce distribution in pakistan. Discover innovative solutions tailored to the unique challenges of the Pakistani market.
Creating a DIY jute chandelier is a fun and stylish project. You’ll need a balloon or a large round object for shaping, jute twine, glue, and a light kit. Wrap the jute around the balloon in a crisscross pattern, applying glue as you go. Once it dries, pop the balloon, install the light kit, and hang your new chandelier for a rustic, handmade touch to your space. Get your hands on the Beetlejuice Beetlejuice Suit and upgrade your wardrobe with movie-inspired fashion.
Good to see the post here. It was very informative. Keep sharing more and more educational and informative article.
This DIY Jute Chandelier is a brilliant idea! I love how you found a way to create a stunning piece without spending a fortune. The creativity and resourcefulness in using jute twine and an embroidery hoop are truly inspiring. It’s amazing to see how you transformed simple materials into something so elegant. Your step-by-step guide makes it easy for anyone to follow along and create their own version. The $30 cost compared to the original $2500 is a fantastic savings, and the end result looks just as impressive. This project is a perfect example of how DIY can achieve high-end looks on a budget. Well done!
Nice post geometry dash breeze here.
“DIY Jute Chandelier” combines elegance and creativity, offering a simple yet stunning decor idea. Perfect for adding a rustic touch to any space, this project showcases how everyday materials can transform into beautiful, functional art with minimal effort.
Need help with your scholarship essay? Our expert scholarship essay writers are here to help you create a standout essay that showcases your strengths, achievements, and goals. With years of experience, our writers provide tailored, high-quality essays that meet the specific requirements of each scholarship. From brainstorming ideas to final edits, we ensure your essay is well-researched, compelling, and free of errors. We understand how important scholarships are to your future, which is why we focus on delivering essays that increase your chances of success. Let our professional writers guide you toward winning your scholarship. Contact us today!
Tired of watching charts all day? Automate your trades now at https://cryptorobotics.ai/
This DIY jute chandelier is so clever! I love how she found a way to get the look she wanted without breaking the bank. Might have to try this, especially since I’ve been wanting to update my living room. This is way better than using something like emojimyface.
This DIY jute chandelier is such a clever idea! I love how she made a high-end look for so cheap. If only I had the time! Maybe I can use Doll Generator for a similar inspiring image if I don’t have the time.
This DIY jute chandelier is so clever! I love how she saved so much money by making her own. This kinda makes me wanna try some game called kiwi clicker too while crafting. Such a cool idea!
Great DIY idea! Very creative! easiest game
Amen to that—my ideas are always way bigger than my budget, so I’ve learned to get creative and compromise without losing the vibe. Some of my favorite results came from those budget-driven pivots. It’s kind of like Drift Boss —you adjust on the fly and still make it work.
That “design in my head vs. money in my wallet” struggle is so real! I love that you tackled this with a DIY jute chandelier. Did you run into any unexpected challenges making the structure sturdy enough?
That “design in my head vs. money in my wallet” struggle is so real! I love that you tackled this with a DIY jute chandelier. Did you run into any unexpected challenges making the structure sturdy enough?
This casino appeared when I was browsing discussions about bonuses people actually manage to use. Someone shared their experience, which made me curious. While reading about Mateslots special offers, I decided to try my luck. The evening started poorly and I laughed at my timing, but things shifted later on. I managed to recover losses and finish ahead, which felt like a small personal win.
Wow, only $30 instead of $2500? That’s insane! And you mostly just needed some jute and a hoop. I’m definitely trying this out next weekend. Who knew you could get such an awesome look with so little? It’s like bringing a burst of creativity into your living room while sipping on coffee.
Trust is built through design choices, not slogans https://cryptorobotics.ai/